Editor's Note
Welcome!
This tutorial was created by Andrew Pino as part of a Technical Communication course assignment at the University of Central Florida (UCF). While it fulfills the requirements of that academic assignment, it was intentionally developed as a real educational resource that is freely available to anyone interested in learning modern web development.
Note to my instructor: The required Reflection Memo (Part 2 of this assignment) is included at the end of this tutorial, immediately following the conclusion.
This website is my personal portfolio and learning platform, where I publish original projects, technical documentation, and educational resources that I have created. Every section of this tutorial, including the written content, organization, code examples, design, and instructional material, was created by me. This work represents my own original effort and reflects my passion for helping others learn modern web development.
My goal is to make technical concepts approachable by providing clear, step-by-step guidance that anyone can follow, regardless of prior experience. Rather than creating this tutorial solely for a grade, I chose to publish it on my personal website so it can continue to serve as a free learning resource for students, hobbyists, and aspiring developers.
Thank you for visiting, and I hope you find this tutorial helpful.
Andrew PinoFounder, APX Studios
Introduction#
Learn what you will build, who the tutorial is for, and how the tools fit together.
This tutorial teaches you how to build and publish a complete beginner-friendly landing page for a fictional brand named BrightPath Studio. You will create the site with HTML, CSS, and vanilla JavaScript, preview it locally, save its history with Git, upload it to GitHub, and deploy it publicly with Vercel.
Use this tutorial if you are new to website development, terminal commands, Git, GitHub, or deployment. You only need basic computer skills: creating folders, downloading files, typing text, and saving files.
Visual Studio Code -> Local Website -> Git -> GitHub -> Vercel -> Public Website| Tool | Plain-language purpose |
|---|---|
| Visual Studio Code | The editor used to create and organize files. |
| HTML | Creates the structure and content of the page. |
| CSS | Controls appearance, spacing, colors, and layout. |
| JavaScript | Adds interaction and behavior. |
| Git | Records changes on your computer. |
| GitHub | Stores the repository online. |
| Vercel | Deploys the repository as a live website. |
What You Will Learn#
By the end of the tutorial, you will be able to:
- Install Visual Studio Code.
- Install Git.
- Create GitHub and Vercel accounts.
- Create and organize a website project.
- Build a semantic HTML page.
- Style a responsive website with CSS.
- Add simple interactivity with JavaScript.
- Preview a website locally with Live Server.
- Explain the purpose of Git and version control.
- Initialize a Git repository.
- Configure a Git username and email.
- Stage files.
- Create a commit.
- Create a GitHub repository.
- Connect a local repository to GitHub.
- Push project files to GitHub.
- Import a GitHub repository into Vercel.
- Deploy a public website.
- Update the project.
- Trigger and verify an automatic Vercel redeployment.
Before You Begin#
Confirm the tools, accounts, and basic skills you need before starting.
Before you write code, make sure you have the required software, accounts, and permission to install applications. Preparing these items first prevents interruptions later.
| Tool or Requirement | Purpose | Required? | Official Resource |
|---|---|---|---|
| Windows or macOS computer | Runs the editor, browser, terminal, and installers. | Yes | Use your own computer or an approved lab computer. |
| Reliable internet connection | Downloads tools and connects to GitHub and Vercel. | Yes | Use a trusted network. |
| Modern browser | Previews and tests the website. | Yes | Chrome, Edge, Firefox, or Safari. |
| Email address | Creates GitHub and Vercel accounts. | Yes | Use an email account you can access. |
| Visual Studio Code | Edits and organizes project files. | Yes | Official Visual Studio Code download page: Open the official Visual Studio Code website |
| Git | Records project history and pushes to GitHub. | Yes | Official Git download page: Open the official Git website |
| GitHub account | Stores the project repository online. | Yes | Official GitHub sign-up page: Open the official GitHub sign-up page |
| Vercel account | Deploys the project to a public URL. | Yes | Official Vercel sign-up page: Open the official Vercel sign-up page |
Install Visual Studio Code#
Download VS Code, install it, identify the interface, and enable helpful beginner settings.
Visual Studio Code, commonly called VS Code, is a free code editor used to create and manage website files. You will use it to create your HTML, CSS, and JavaScript files.
- Open the official Visual Studio Code download page.
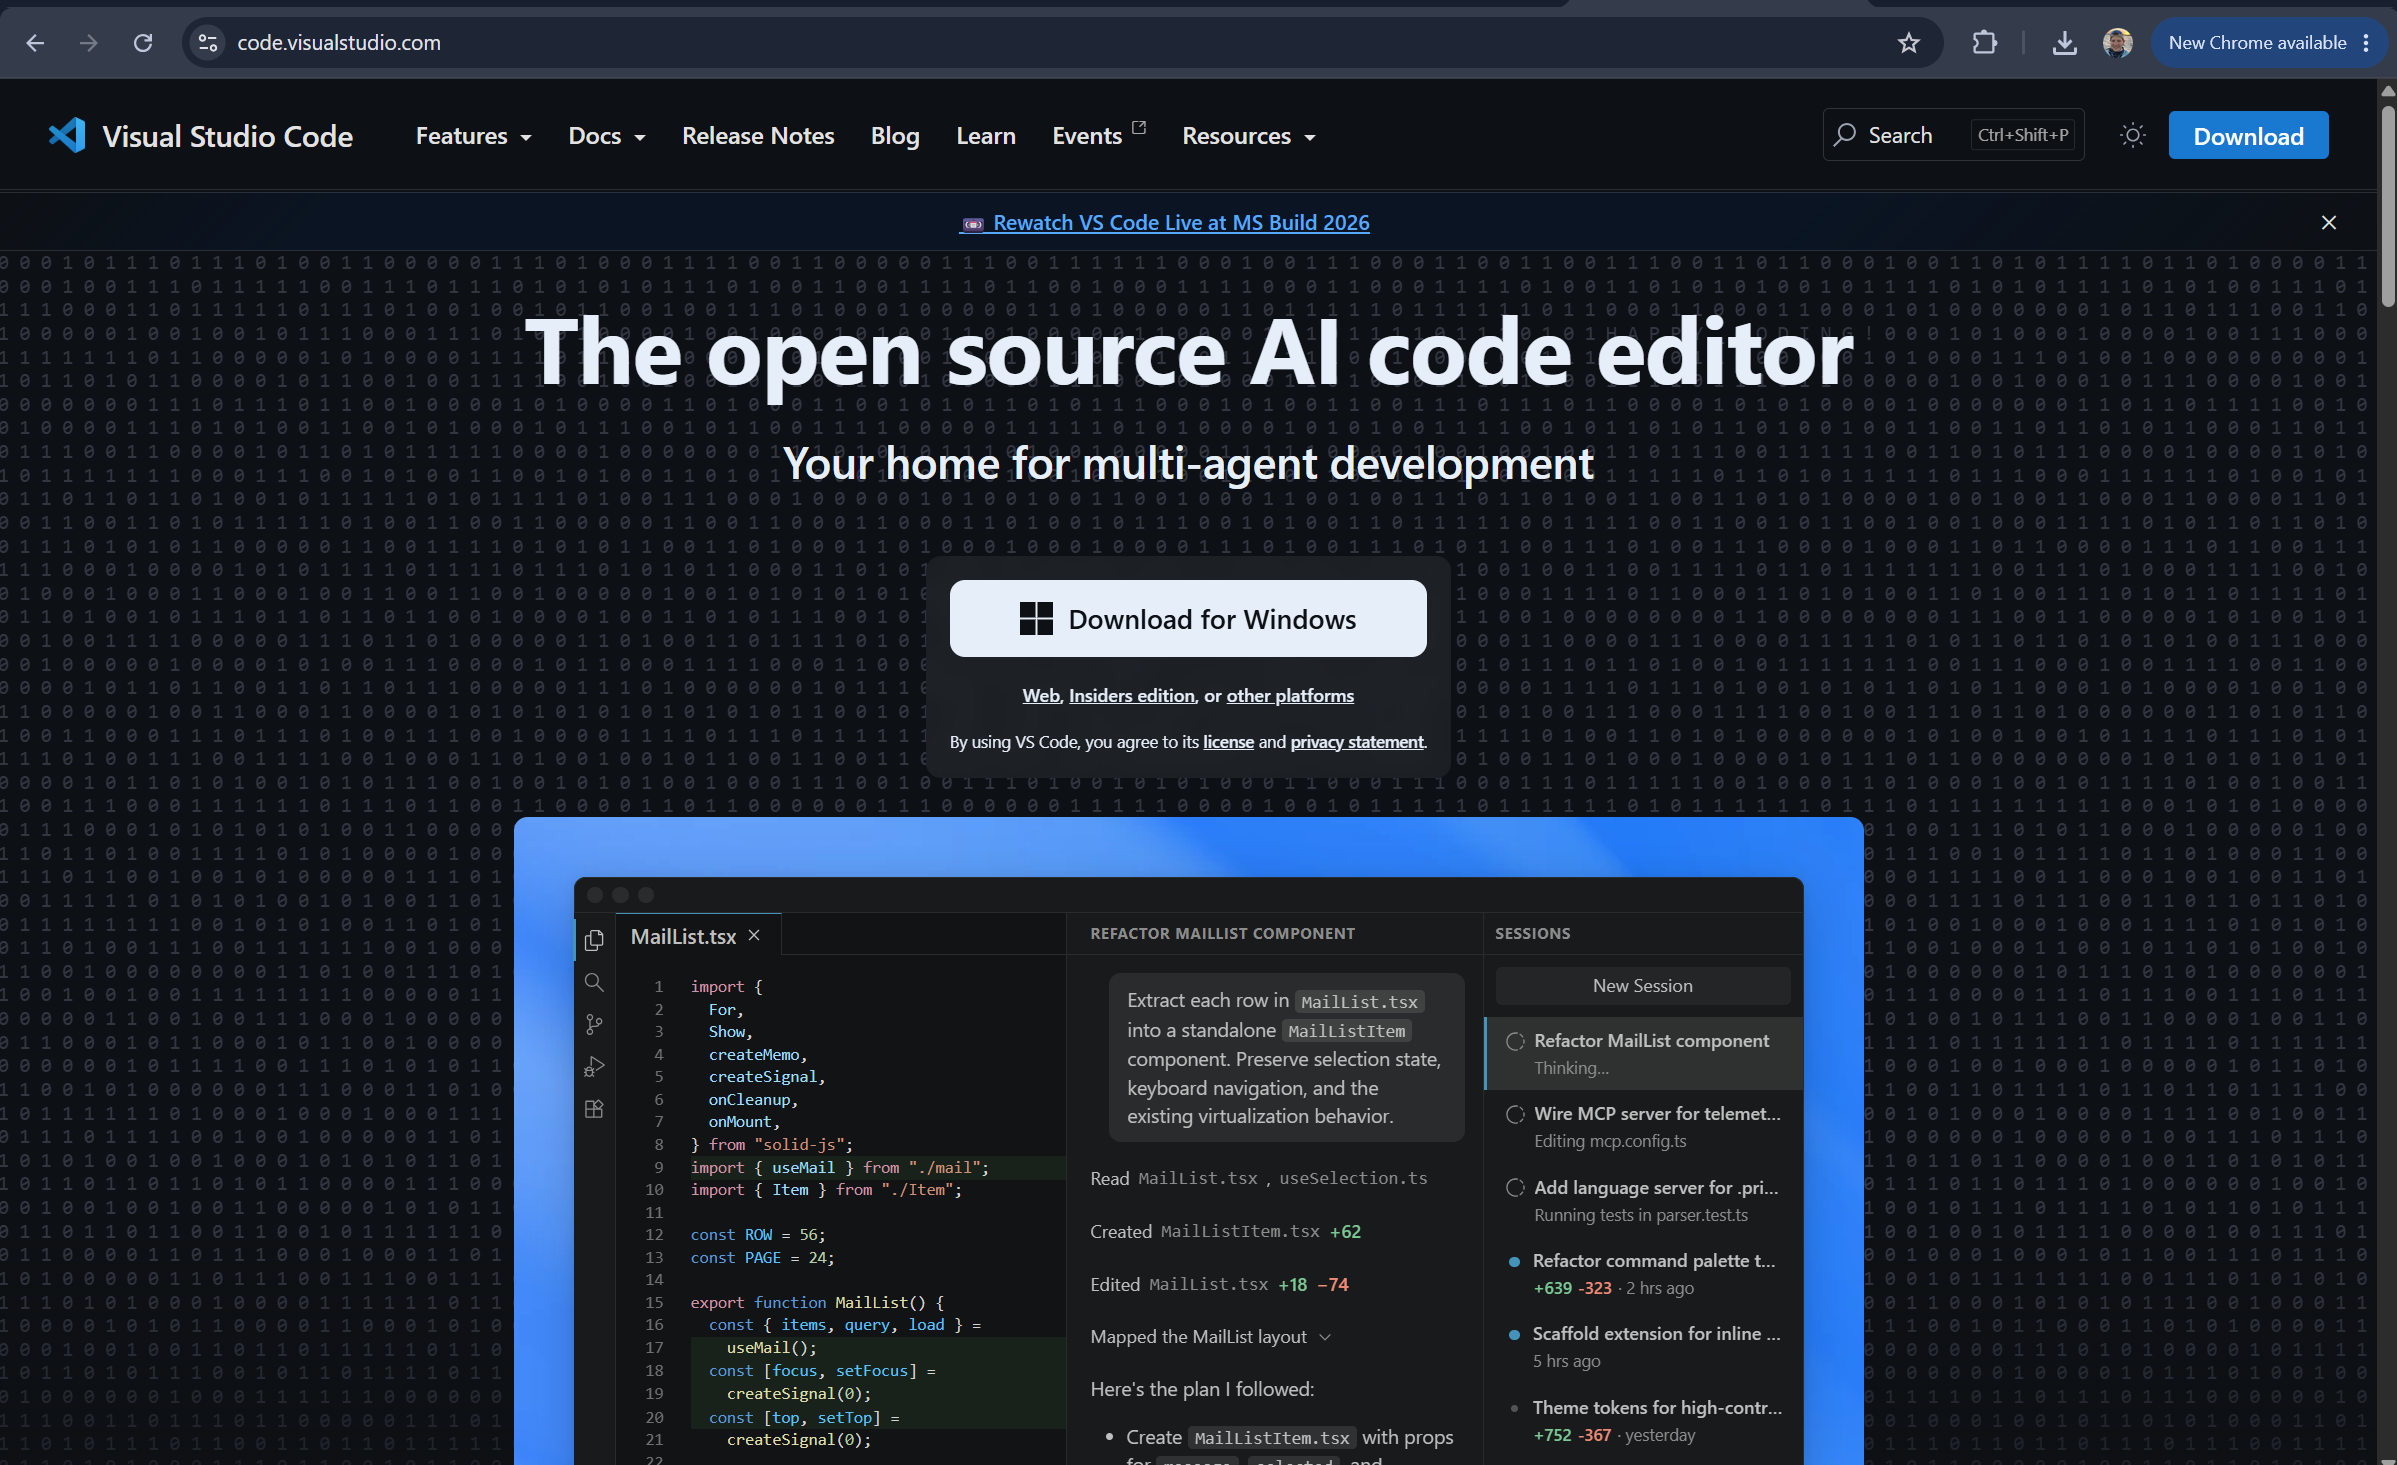
- Select the correct download for your operating system.
- Open the downloaded installer.
- Review the installation options.
- Complete the installation.
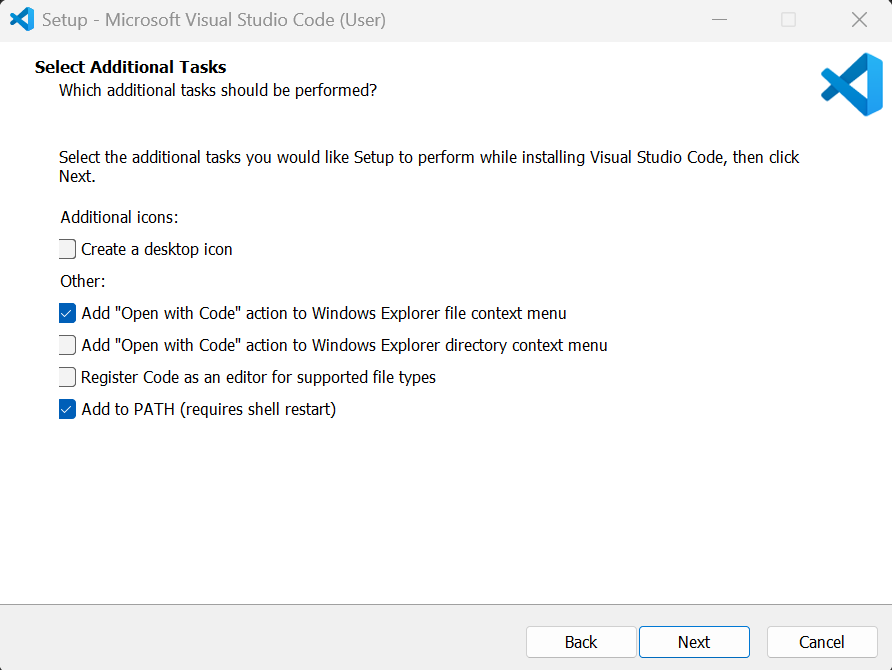
On Windows, useful optional installer settings may include adding Open with Code to file and folder context menus, adding VS Code to PATH, and creating a desktop icon. PATH is a system setting that helps your computer find programs from the terminal. These options are helpful, but do not treat every optional checkbox as mandatory.
On macOS, you may need to drag Visual Studio Code into the Applications folder. This keeps the app in the normal location for installed programs.
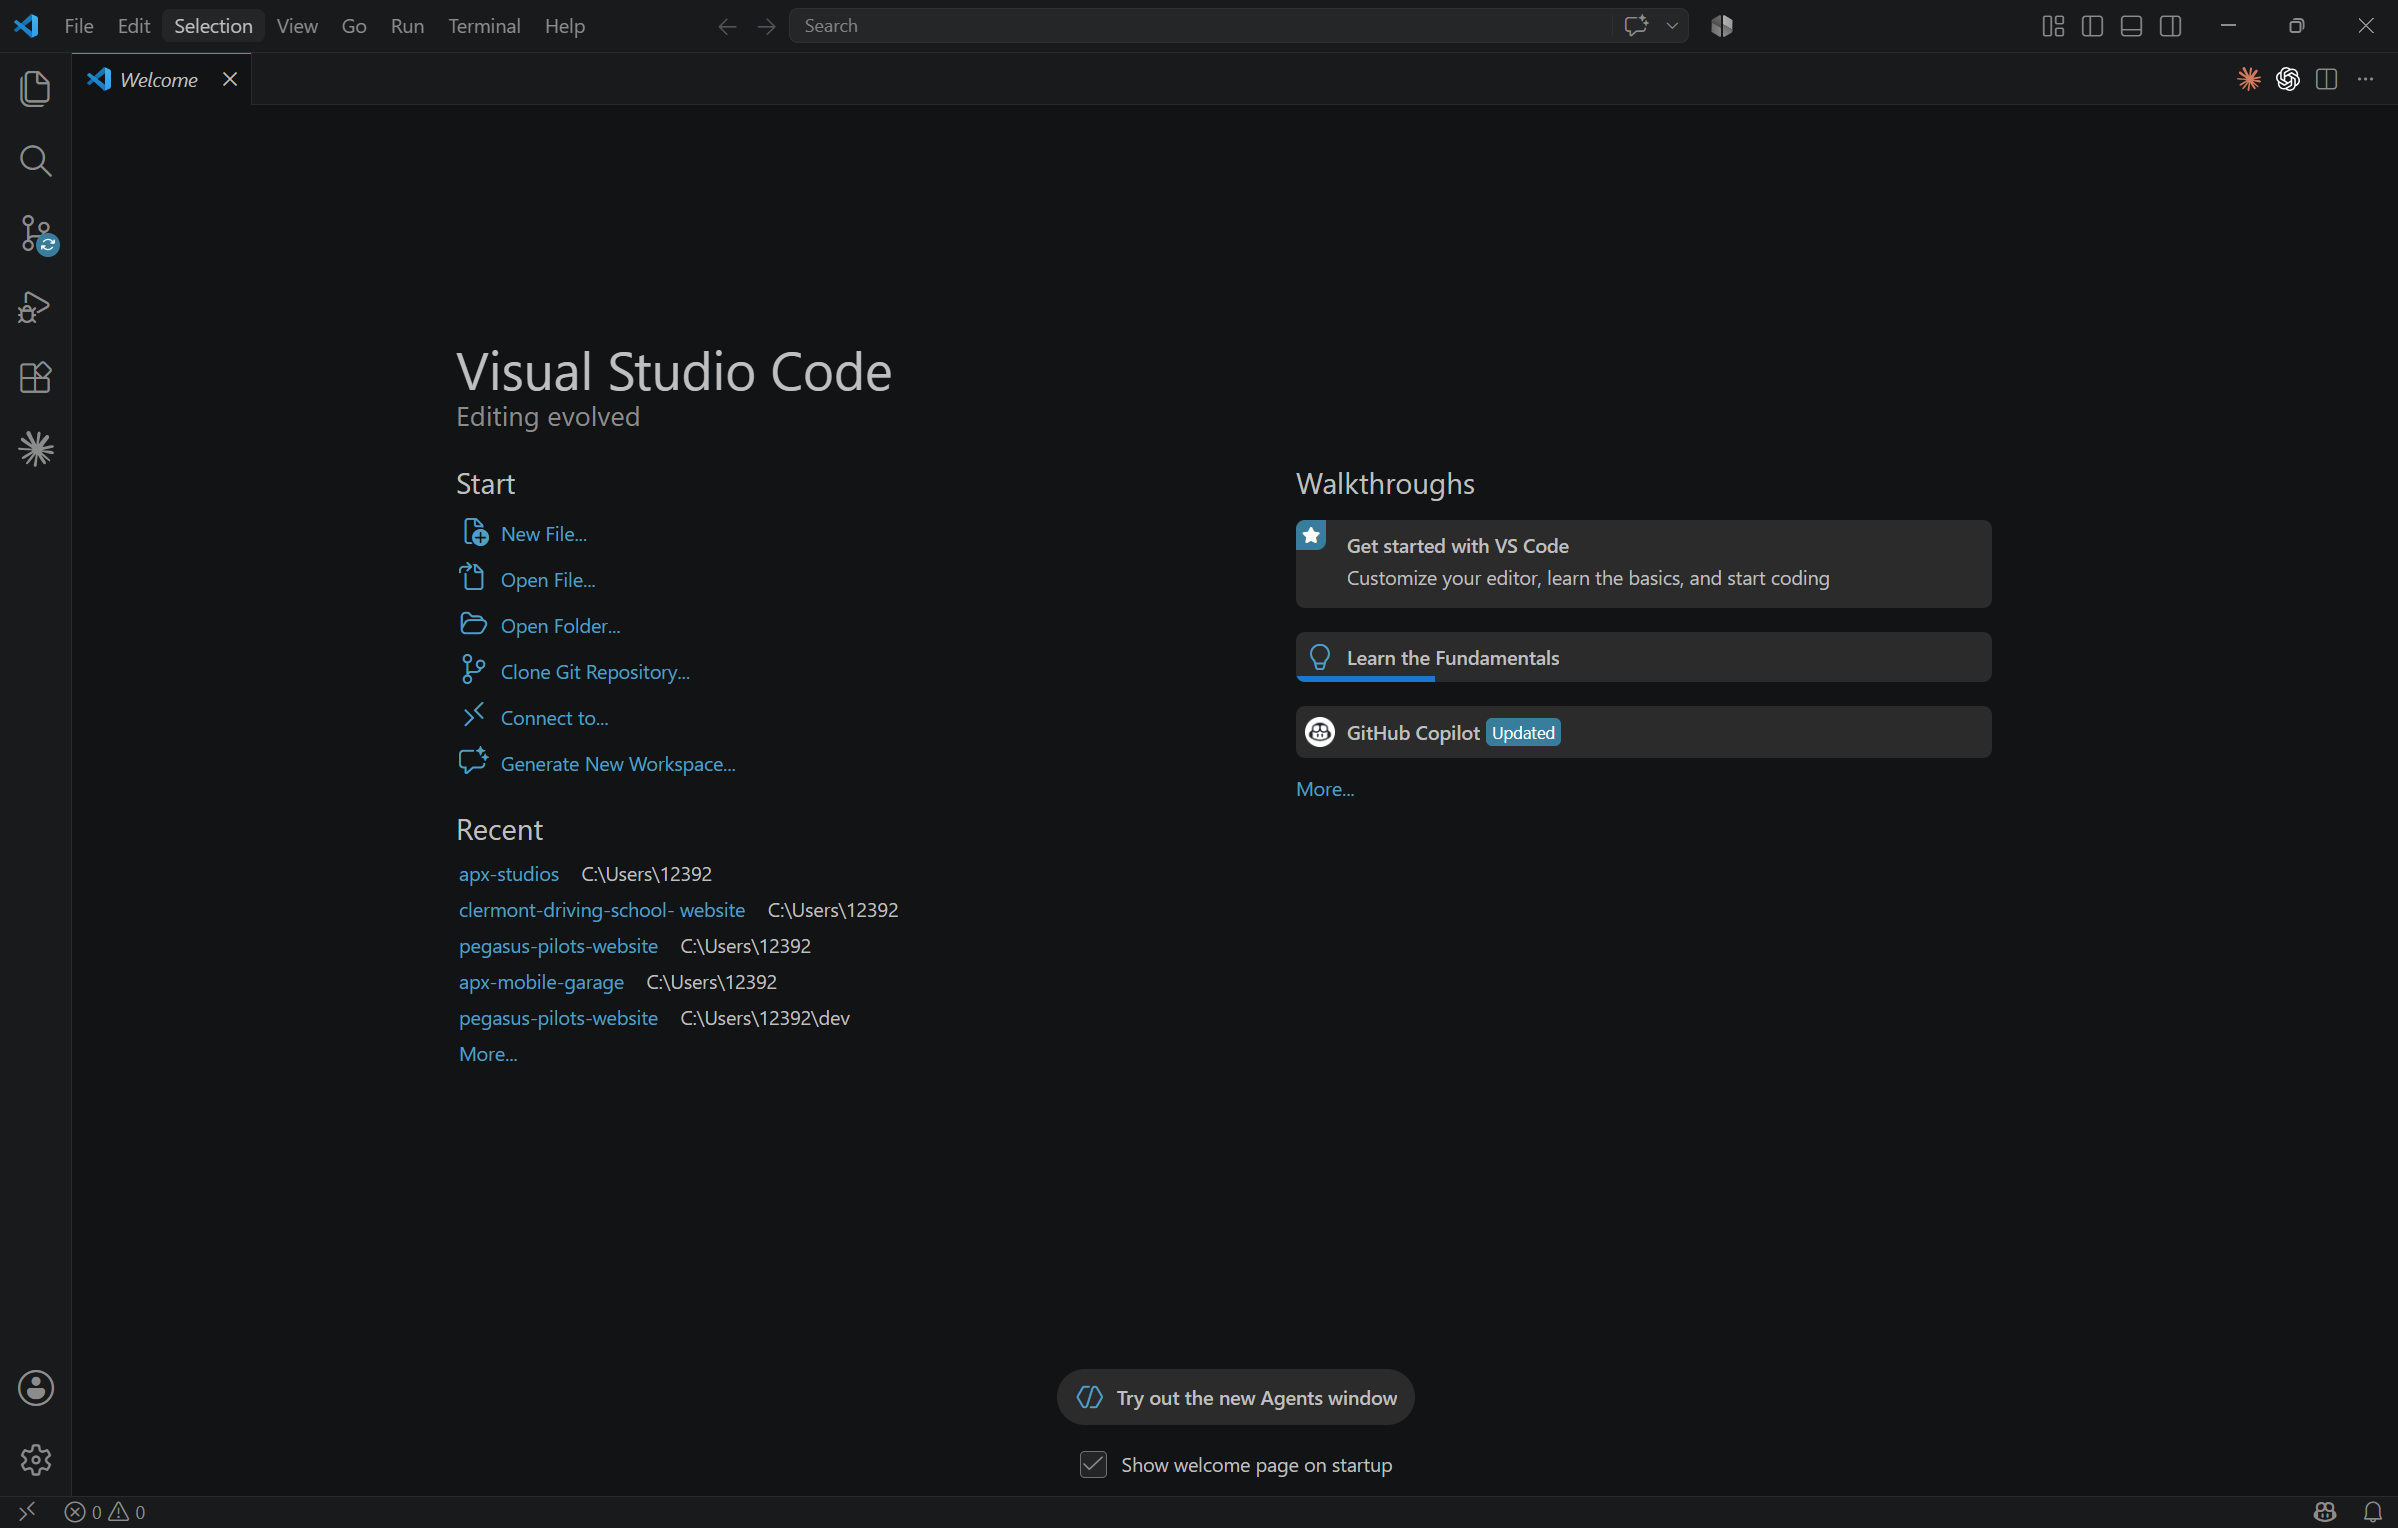
- Launch Visual Studio Code.
Identify the Main VS Code Areas#
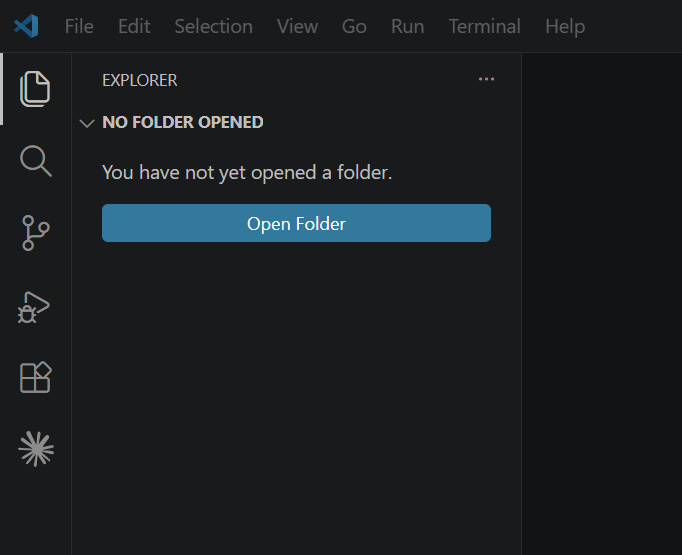
| Interface Area | Location | Purpose |
|---|---|---|
| Activity Bar | Far left side | Switches between Explorer, Search, Source Control, Run, and Extensions. |
| Explorer | Left panel | Shows folders and files in your project. |
| Editor | Center area | Displays the file you are editing. |
| Panel | Bottom area | Shows terminal, problems, output, and debugging information. |
| Integrated Terminal | Bottom panel | Runs commands without leaving VS Code. |
| Status Bar | Bottom edge | Shows file and tool status information. |
Configure Helpful Beginner Settings#
Beginner-friendly settings include Auto Save, Word Wrap, comfortable font size, a file icon theme, a default terminal, and optional Format on Save. Format on Save may require a formatter extension, so treat it as helpful rather than required.
- Open VS Code.
- Open the File menu.
- Select Auto Save.
- Edit a file and pause for a moment.
- Confirm the file saves automatically.
- Open the View menu.
- Select Word Wrap.
- Open a long line of text.
- Confirm the line wraps instead of forcing horizontal scrolling in the editor.
Install Git#
Install Git, understand how it differs from GitHub, and verify the installation.
Git is a version-control system that records changes to files. It allows you to create labeled checkpoints, compare versions, return to earlier work, and send a project to GitHub.
Git and GitHub are different. Git runs on your computer. GitHub is an online service that stores Git repositories.
| Git | GitHub |
|---|---|
| Runs on the computer | Runs as an online service |
| Records file history | Stores repositories online |
| Uses commands or editor tools | Supports sharing and collaboration |
| Works without internet for local actions | Requires internet for online actions |
- Open the official Git website.
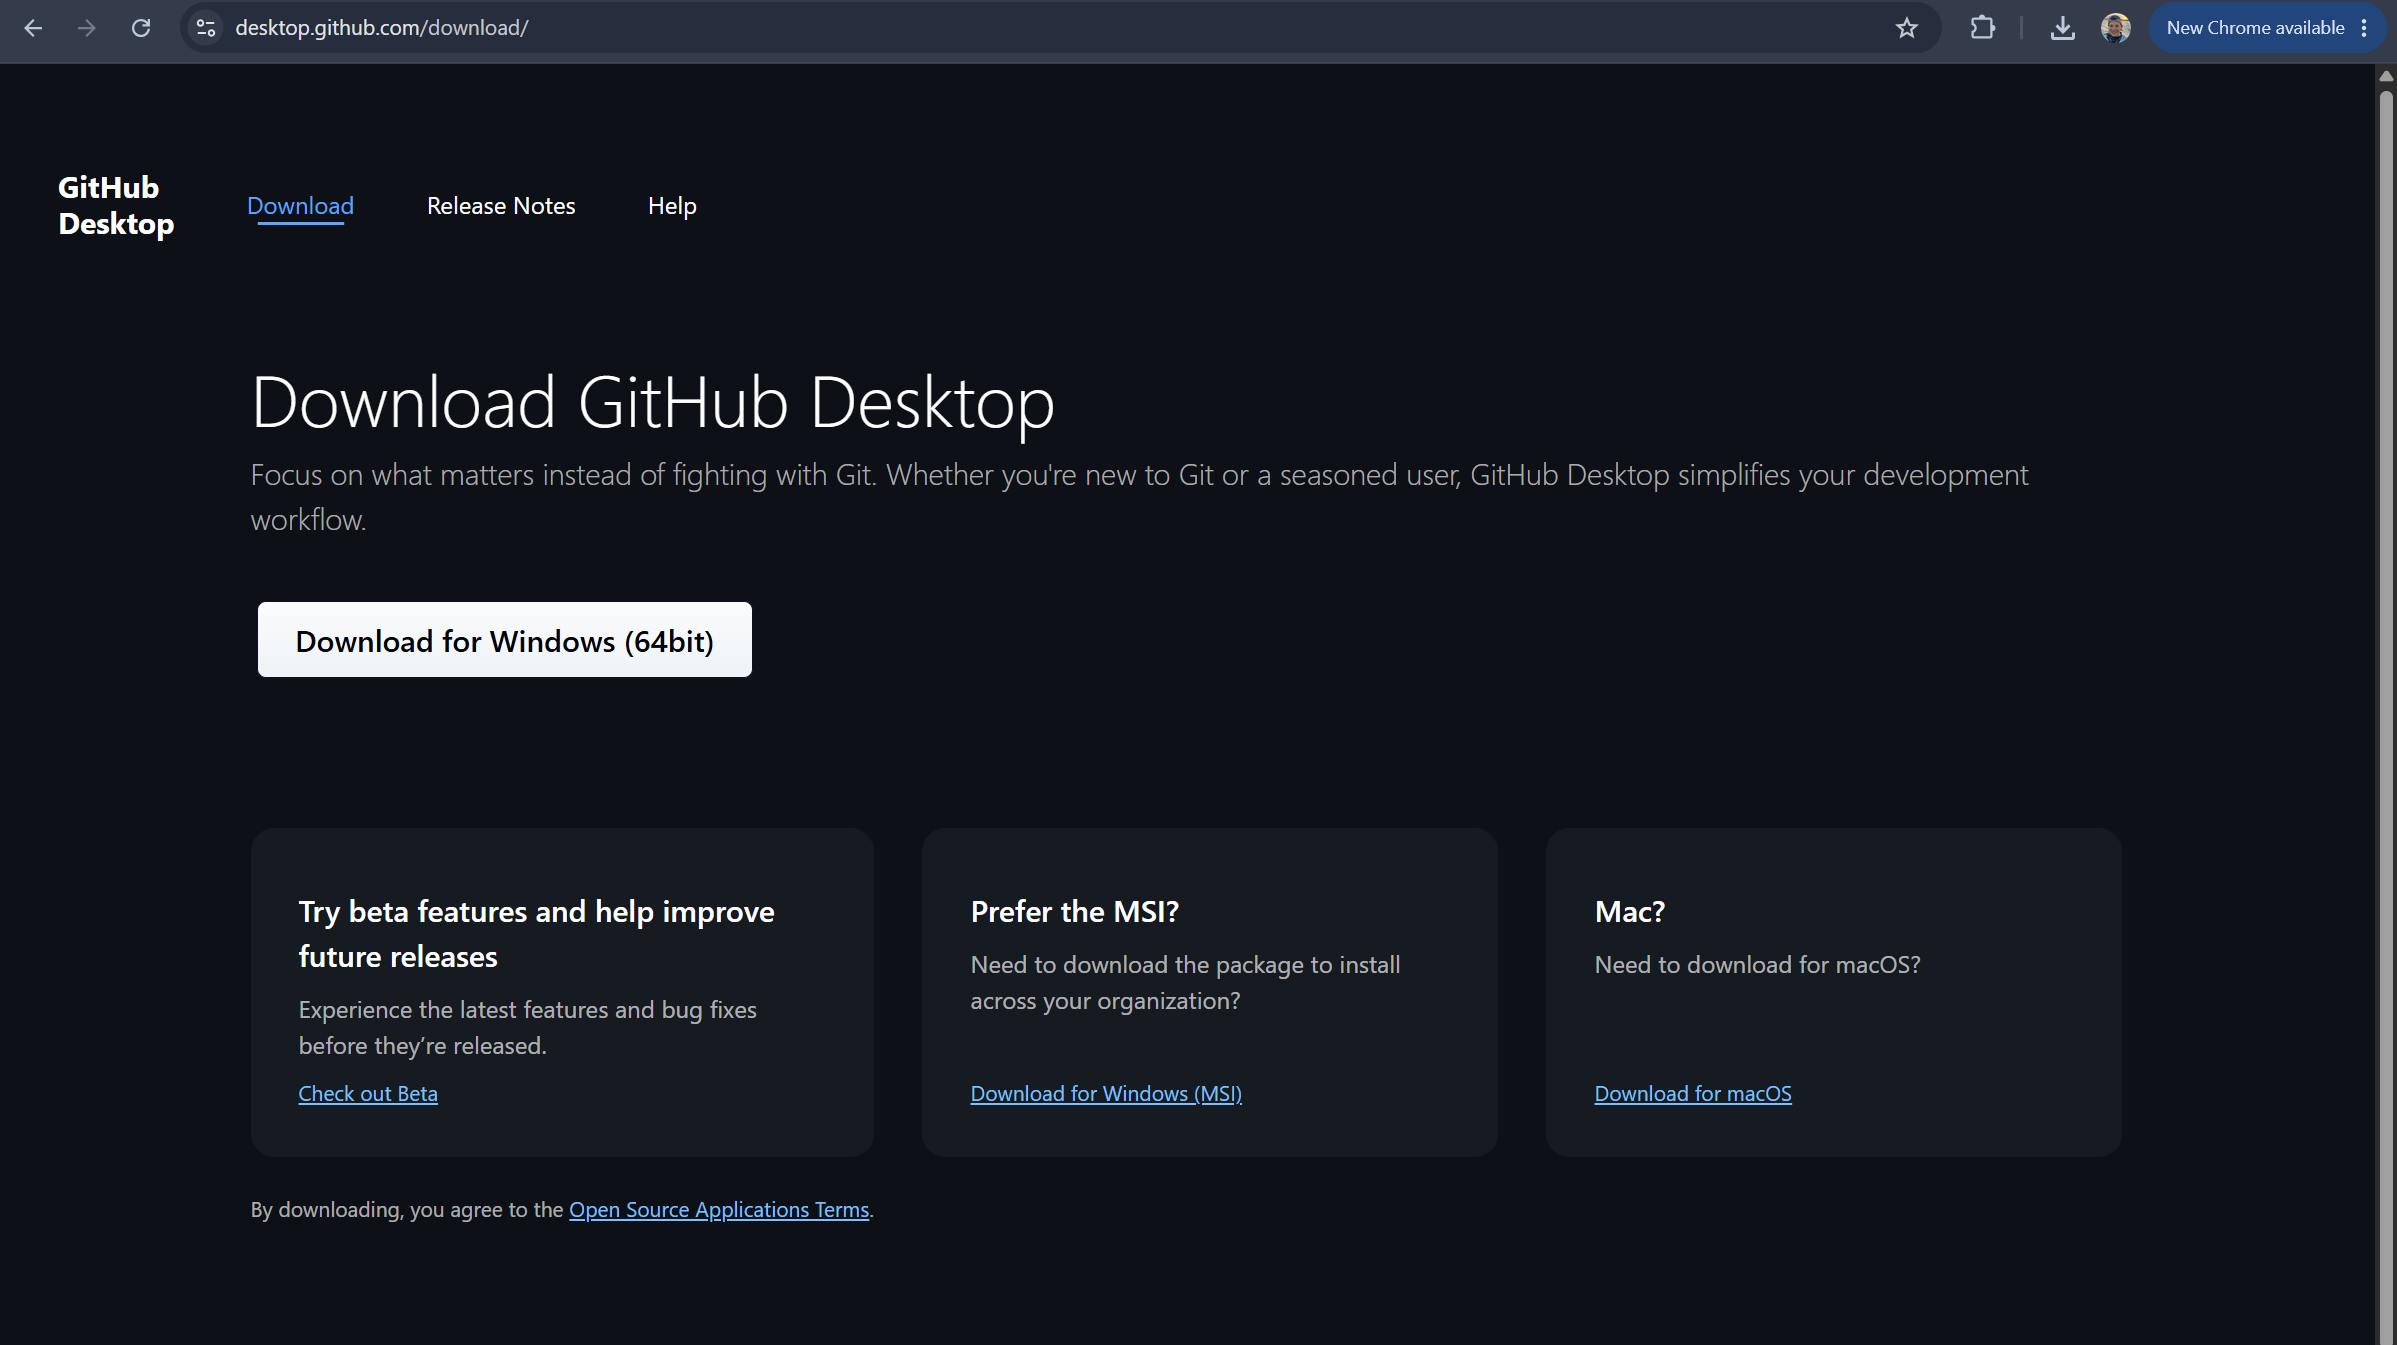
- Download Git for Windows.
- Open the installer.
- Keep beginner-safe defaults unless this tutorial identifies a useful option.
- Complete the installation.
- Restart Visual Studio Code if it was open.
On macOS, Git may already be installed or may be offered through Apple command-line tools when you first run a Git command. You can also use the official Git installer. This tutorial does not require Homebrew.
Verify the Git Installation#
- Open Visual Studio Code.
- Select Terminal > New Terminal.
- Confirm the terminal opens in the lower panel.
- Type the command below and press Enter.
git --versionThe output should show a Git version number. Your exact number may be different from the example.
git version 2.x.x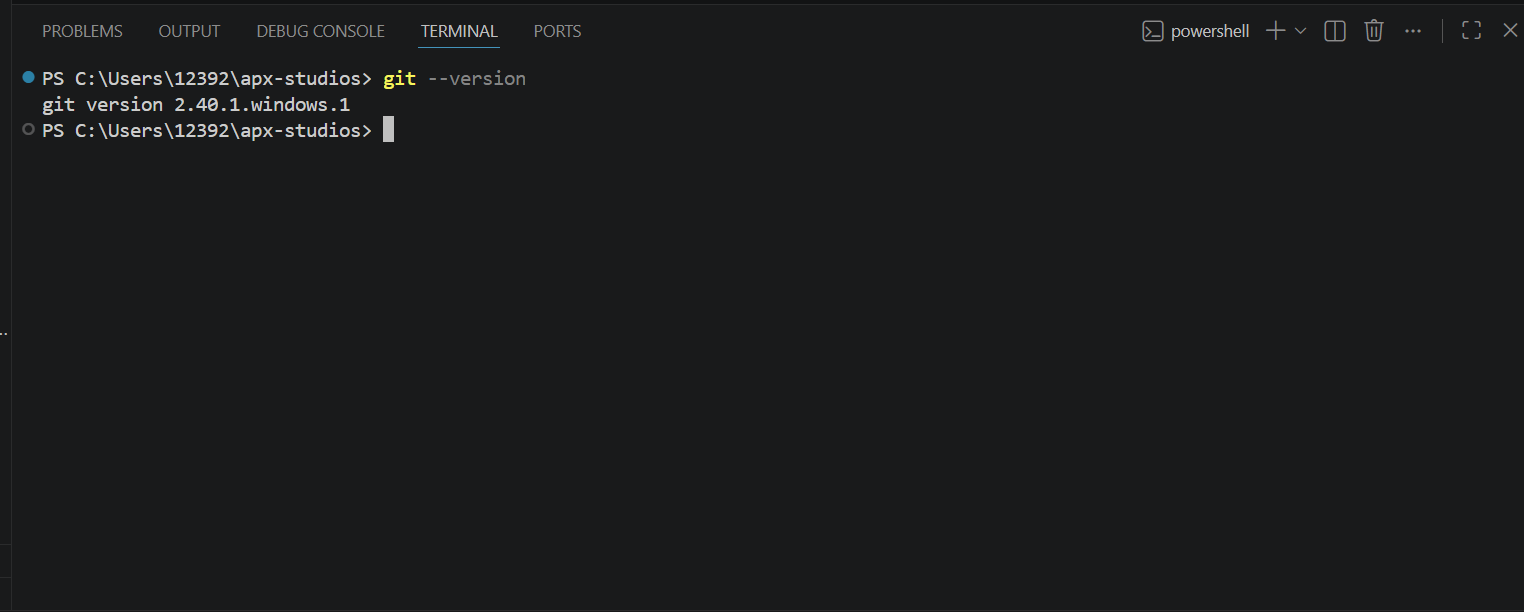
Create Your Website Project#
Create the my-first-website folder and add the three project files.
Create one folder for the project and keep every website file inside it. Use the exact folder name my-first-website. Lowercase letters and hyphens are recommended because spaces and inconsistent capitalization can cause confusion across tools and operating systems.
- Create a folder named my-first-website.
- Open Visual Studio Code.
- Select File > Open Folder.
- Locate and select my-first-website.
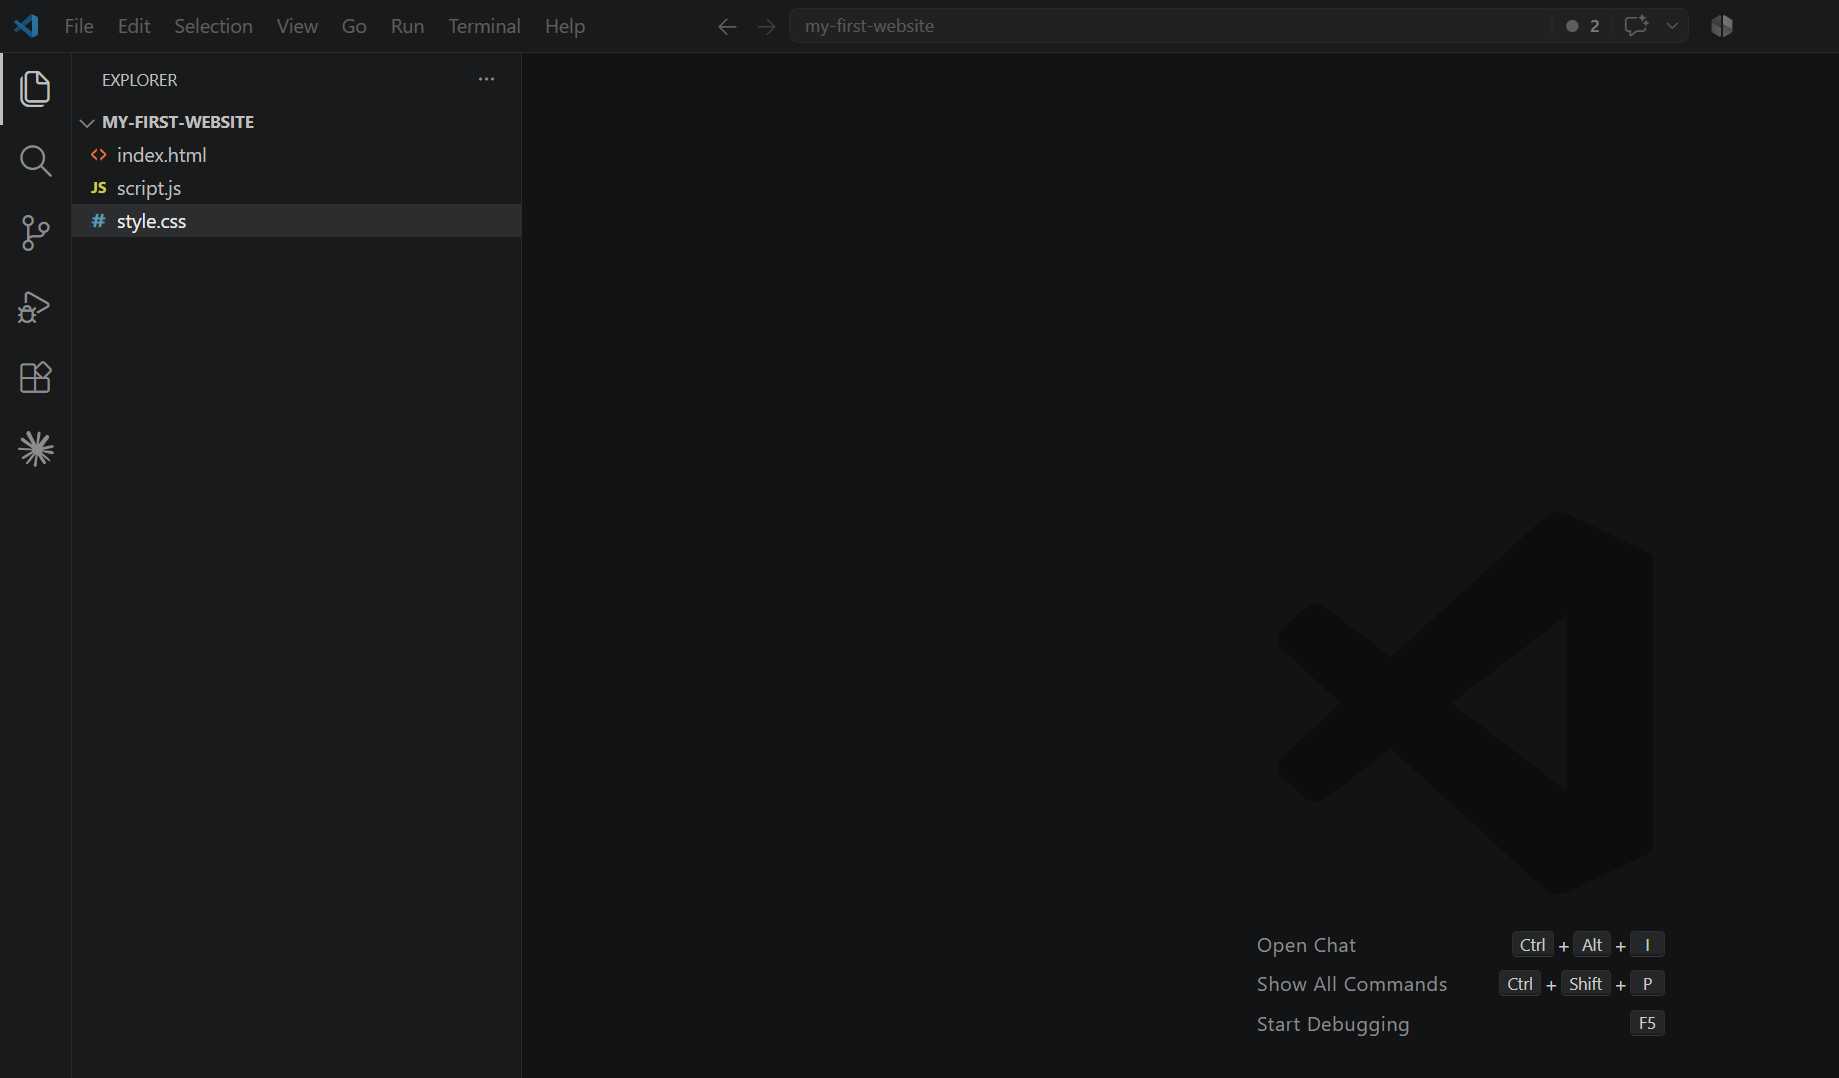
- Confirm the folder appears in the Explorer panel.
my-first-website/
|-- index.html
|-- style.css
|-- script.js- In the Explorer panel, select the New File button.
- Create index.html.
- Create style.css.
- Create script.js.
- Confirm all three files appear inside my-first-website.
| File | Purpose |
|---|---|
| index.html | Contains the website's structure and visible content. |
| style.css | Controls colors, fonts, spacing, and layout. |
| script.js | Adds interaction and dynamic behavior. |
A file extension is the ending after a period in a filename. The extension tells tools what kind of file it is. The name index.html is commonly used as the default homepage because many servers look for it first.
Build the Page Structure with HTML#
Create the complete semantic HTML file for the BrightPath Studio website.
HTML stands for HyperText Markup Language. It describes the structure and meaning of webpage content. In this chapter, you will create the complete page structure before adding visual styling.
- Open index.html in VS Code.
- Select all existing text in the file if any exists.
- Paste the complete HTML below.
- Save the file.
- Check that the filename is exactly index.html.
<!DOCTYPE html>
<html lang="en">
<head>
<meta charset="utf-8" />
<meta name="viewport" content="width=device-width, initial-scale=1" />
<title>BrightPath Studio | Practical Websites for Growing Teams</title>
<meta
name="description"
content="BrightPath Studio creates simple, responsive websites for small teams and independent professionals."
/>
<link rel="stylesheet" href="style.css" />
<script src="script.js" defer></script>
</head>
<body>
<a class="skip-link" href="#main-content">Skip to main content</a>
<header class="site-header">
<div class="container header-inner">
<a class="brand" href="#top" aria-label="BrightPath Studio home">
BrightPath Studio
</a>
<button
class="menu-button"
type="button"
aria-expanded="false"
aria-controls="site-navigation"
>
Menu
</button>
<nav id="site-navigation" class="site-nav" aria-label="Primary navigation">
<a href="#about">About</a>
<a href="#features">Features</a>
<a href="#work">Work</a>
<a href="#contact">Contact</a>
</nav>
<button class="theme-button" type="button" aria-label="Switch to dark mode">
Dark mode
</button>
</div>
</header>
<main id="main-content">
<section id="top" class="hero section">
<div class="container hero-grid">
<div>
<p class="eyebrow">Simple websites. Clear next steps.</p>
<h1>Build a Better Online Presence</h1>
<p class="hero-copy">
BrightPath Studio helps small teams turn scattered ideas into a
focused website that is easy to read, easy to use, and ready to share.
</p>
<div class="hero-actions">
<a class="button primary-button" href="#contact">Plan your project</a>
<a class="text-link" href="#features">See what is included</a>
</div>
<p id="cta-message" class="interaction-message" aria-live="polite"></p>
</div>
<div class="hero-card" aria-label="Project highlights">
<p class="card-label">Starter Site</p>
<ul>
<li>Responsive layout</li>
<li>Accessible navigation</li>
<li>Dark-mode support</li>
</ul>
</div>
</div>
</section>
<section id="about" class="section">
<div class="container narrow">
<p class="eyebrow">About</p>
<h2>Websites should make information easier to understand.</h2>
<p>
BrightPath Studio is a fictional design studio created for this tutorial.
Its landing page demonstrates common website sections without requiring a
framework, database, or build tool.
</p>
</div>
</section>
<section id="features" class="section muted-section">
<div class="container">
<div class="section-heading">
<p class="eyebrow">Features</p>
<h2>A small page with practical details</h2>
</div>
<div class="feature-grid">
<article class="feature-card">
<h3>Thoughtful Design</h3>
<p>Clear headings, useful spacing, and readable text help visitors scan quickly.</p>
</article>
<article class="feature-card">
<h3>Responsive Layouts</h3>
<p>The page adjusts for mobile, tablet, and desktop screens with one CSS file.</p>
</article>
<article class="feature-card">
<h3>Simple Solutions</h3>
<p>Beginner-friendly HTML, CSS, and JavaScript keep the project understandable.</p>
</article>
</div>
</div>
</section>
<section id="work" class="section">
<div class="container work-grid">
<div>
<p class="eyebrow">Work</p>
<h2>Designed for a focused first project</h2>
</div>
<div class="work-list">
<p>Use this page as a starter portfolio, service page, or project landing page.</p>
<p>After deployment, you can replace the example text with your own content.</p>
</div>
</div>
</section>
<section class="section cta-section" aria-labelledby="cta-heading">
<div class="container cta-box">
<h2 id="cta-heading">Ready to publish your first website?</h2>
<p>Finish the tutorial to put this page online with GitHub and Vercel.</p>
<button id="encouragement-button" class="button primary-button" type="button">
Show encouragement
</button>
</div>
</section>
<section id="contact" class="section">
<div class="container narrow">
<p class="eyebrow">Contact</p>
<h2>Start with one clear message.</h2>
<p>
This tutorial uses example contact information. Replace it before using
the project for a real organization.
</p>
<a class="button secondary-button" href="mailto:hello@example.com">
Email hello@example.com
</a>
</div>
</section>
</main>
<footer class="site-footer">
<div class="container footer-inner">
<p>© <span id="current-year">2026</span> BrightPath Studio.</p>
<a href="#top">Back to top</a>
</div>
</footer>
</body>
</html>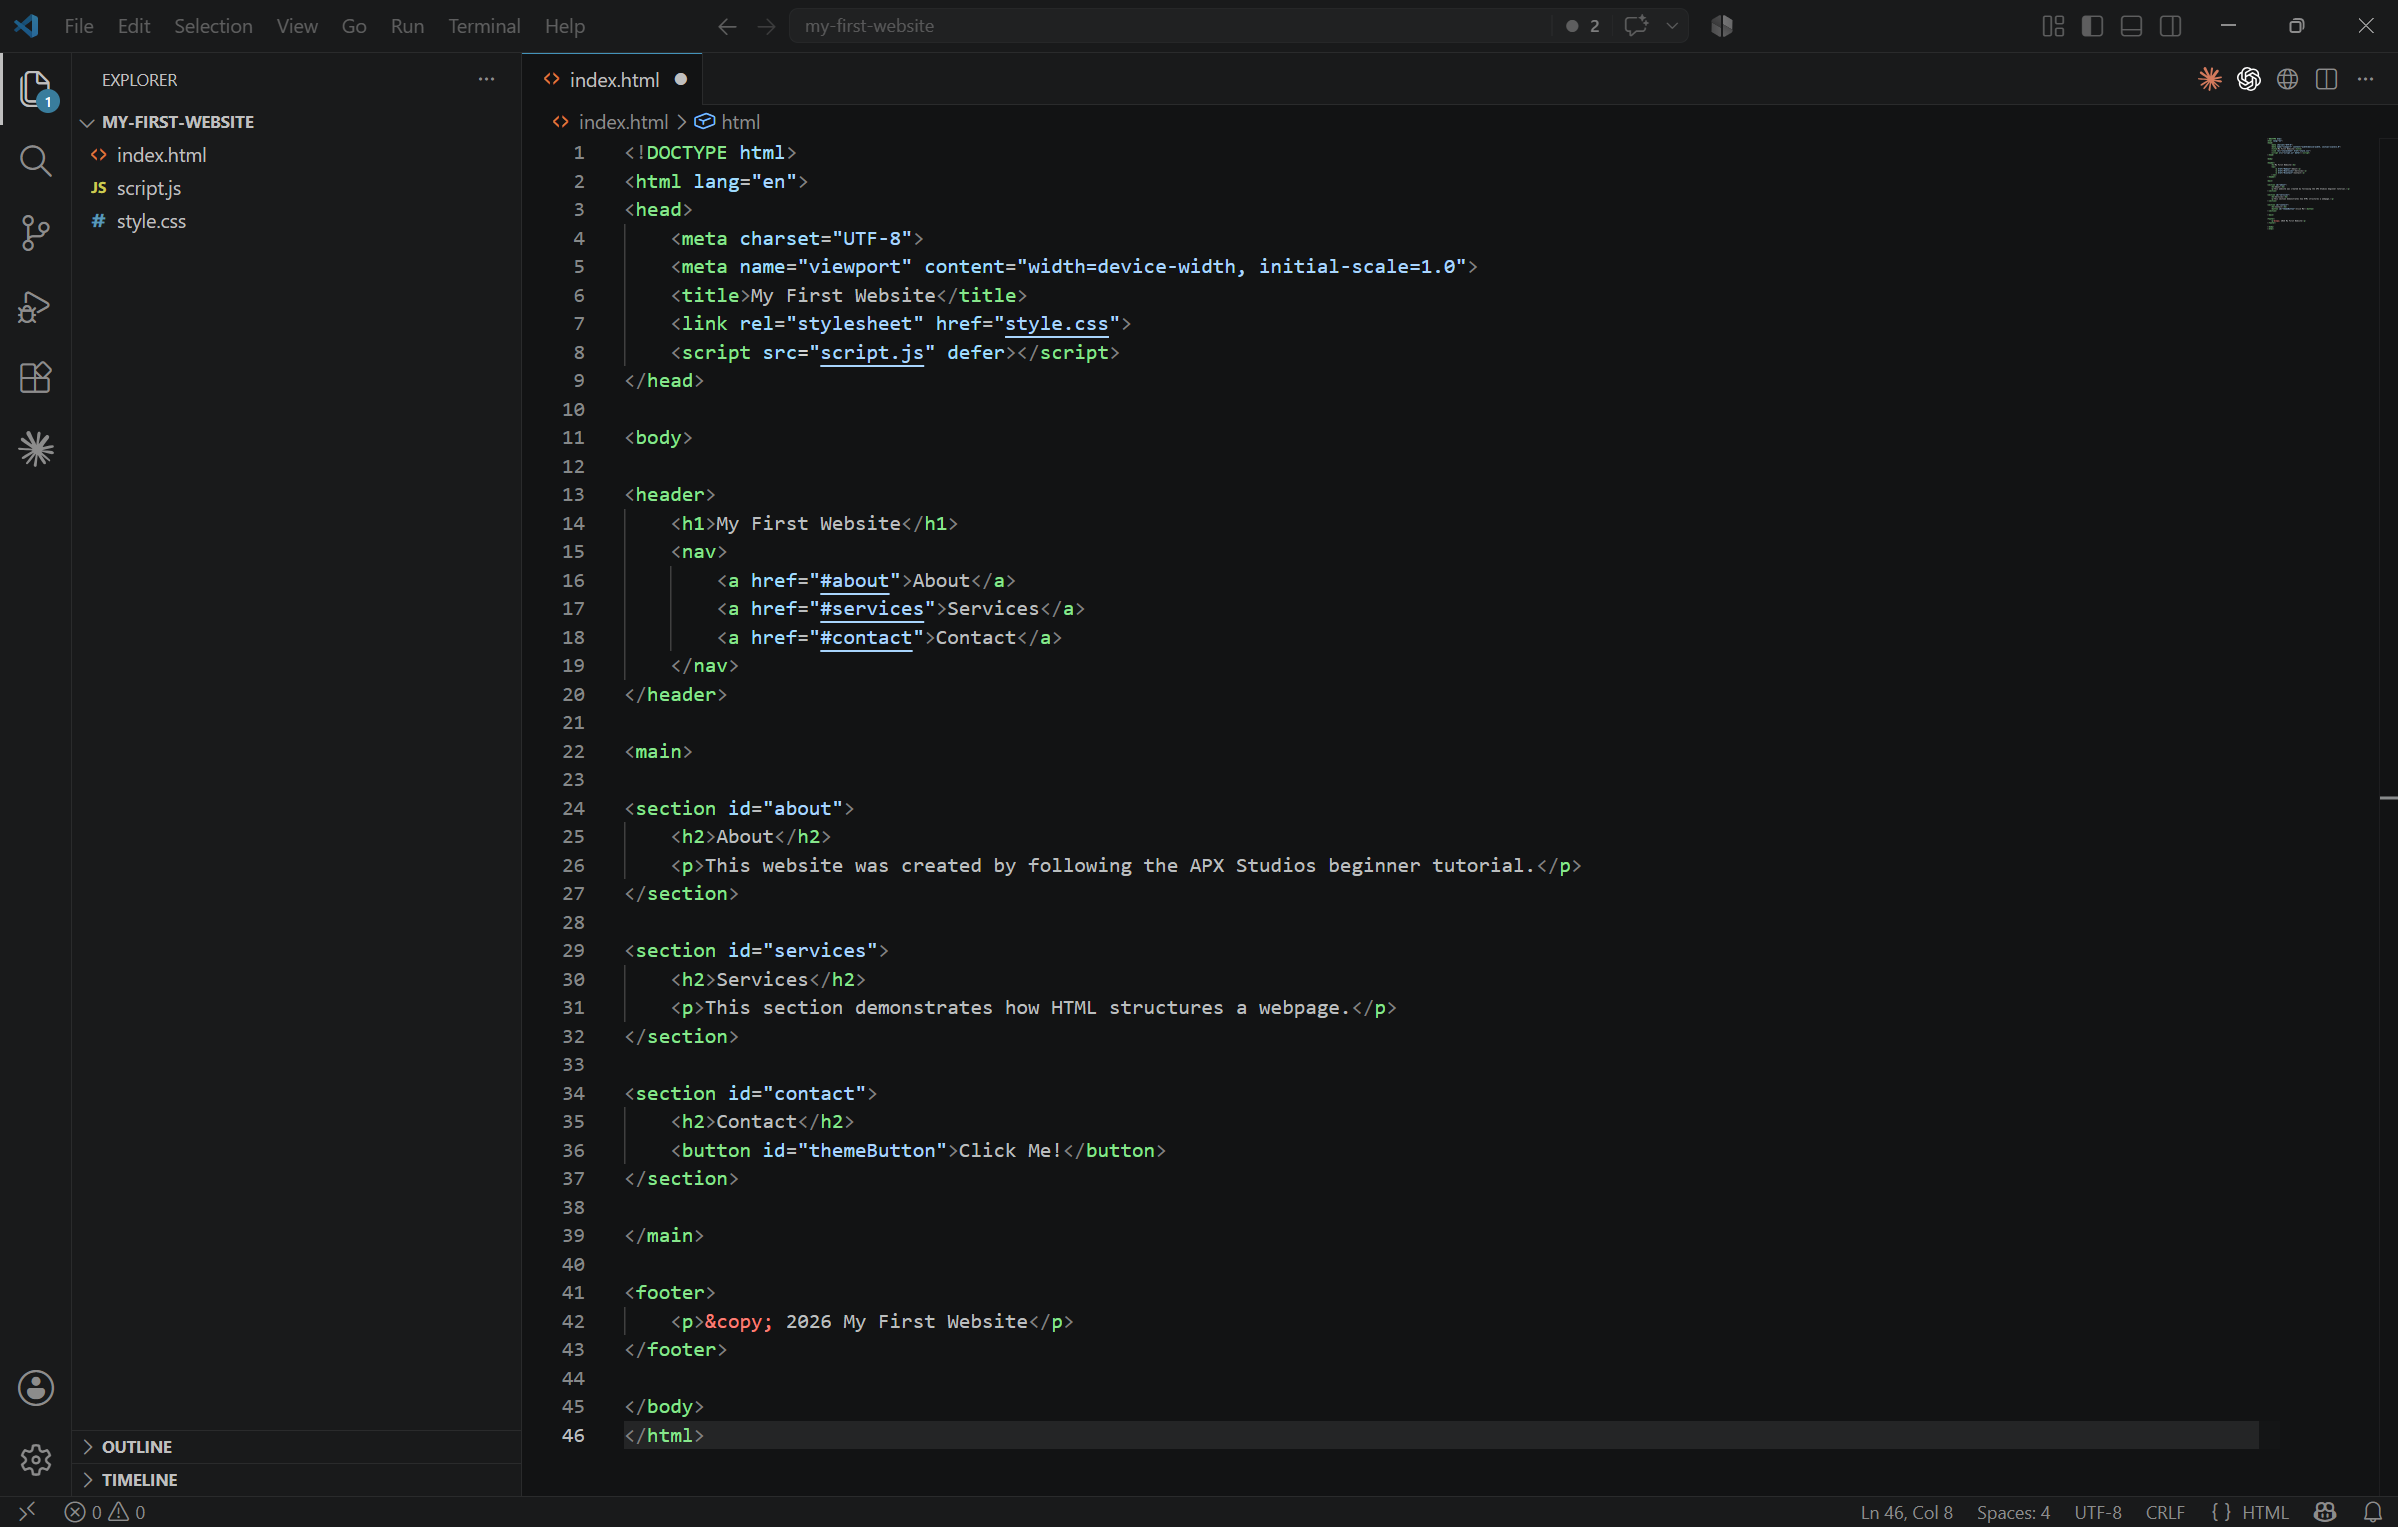
Understand the Document Declaration#
<!DOCTYPE html> tells the browser to use modern HTML rules. It is short, but it prevents older browser behavior from affecting your page.
Understand the HTML Element#
The html element wraps the full page. The lang="en" attribute tells browsers and assistive technologies that the page language is English.
Understand the Head Section#
The head section contains information about the page. Character encoding supports standard text characters. The viewport line helps the page scale on mobile screens. The title appears in browser tabs. The meta description summarizes the page. The stylesheet link connects style.css. The deferred script connects script.js after the HTML is ready.
Understand Semantic Page Structure#
Semantic elements describe the role of content. Header contains the brand and navigation. Nav contains links. Main contains the unique page content. Section groups related content. Article is useful for reusable cards. Footer contains closing site information.
Connect Navigation Links to Sections#
Links such as href="#about" move the browser to an element with id="about". Spelling and capitalization must match exactly.
Connect the CSS and JavaScript Files#
<link rel="stylesheet" href="style.css">
<script src="script.js" defer></script>
The link element loads the CSS file. The script element loads the JavaScript file. The defer attribute tells the browser to wait until the HTML is ready before running the script.
Style the Website with CSS#
Add responsive visual design, focus states, dark mode, and reduced-motion support.
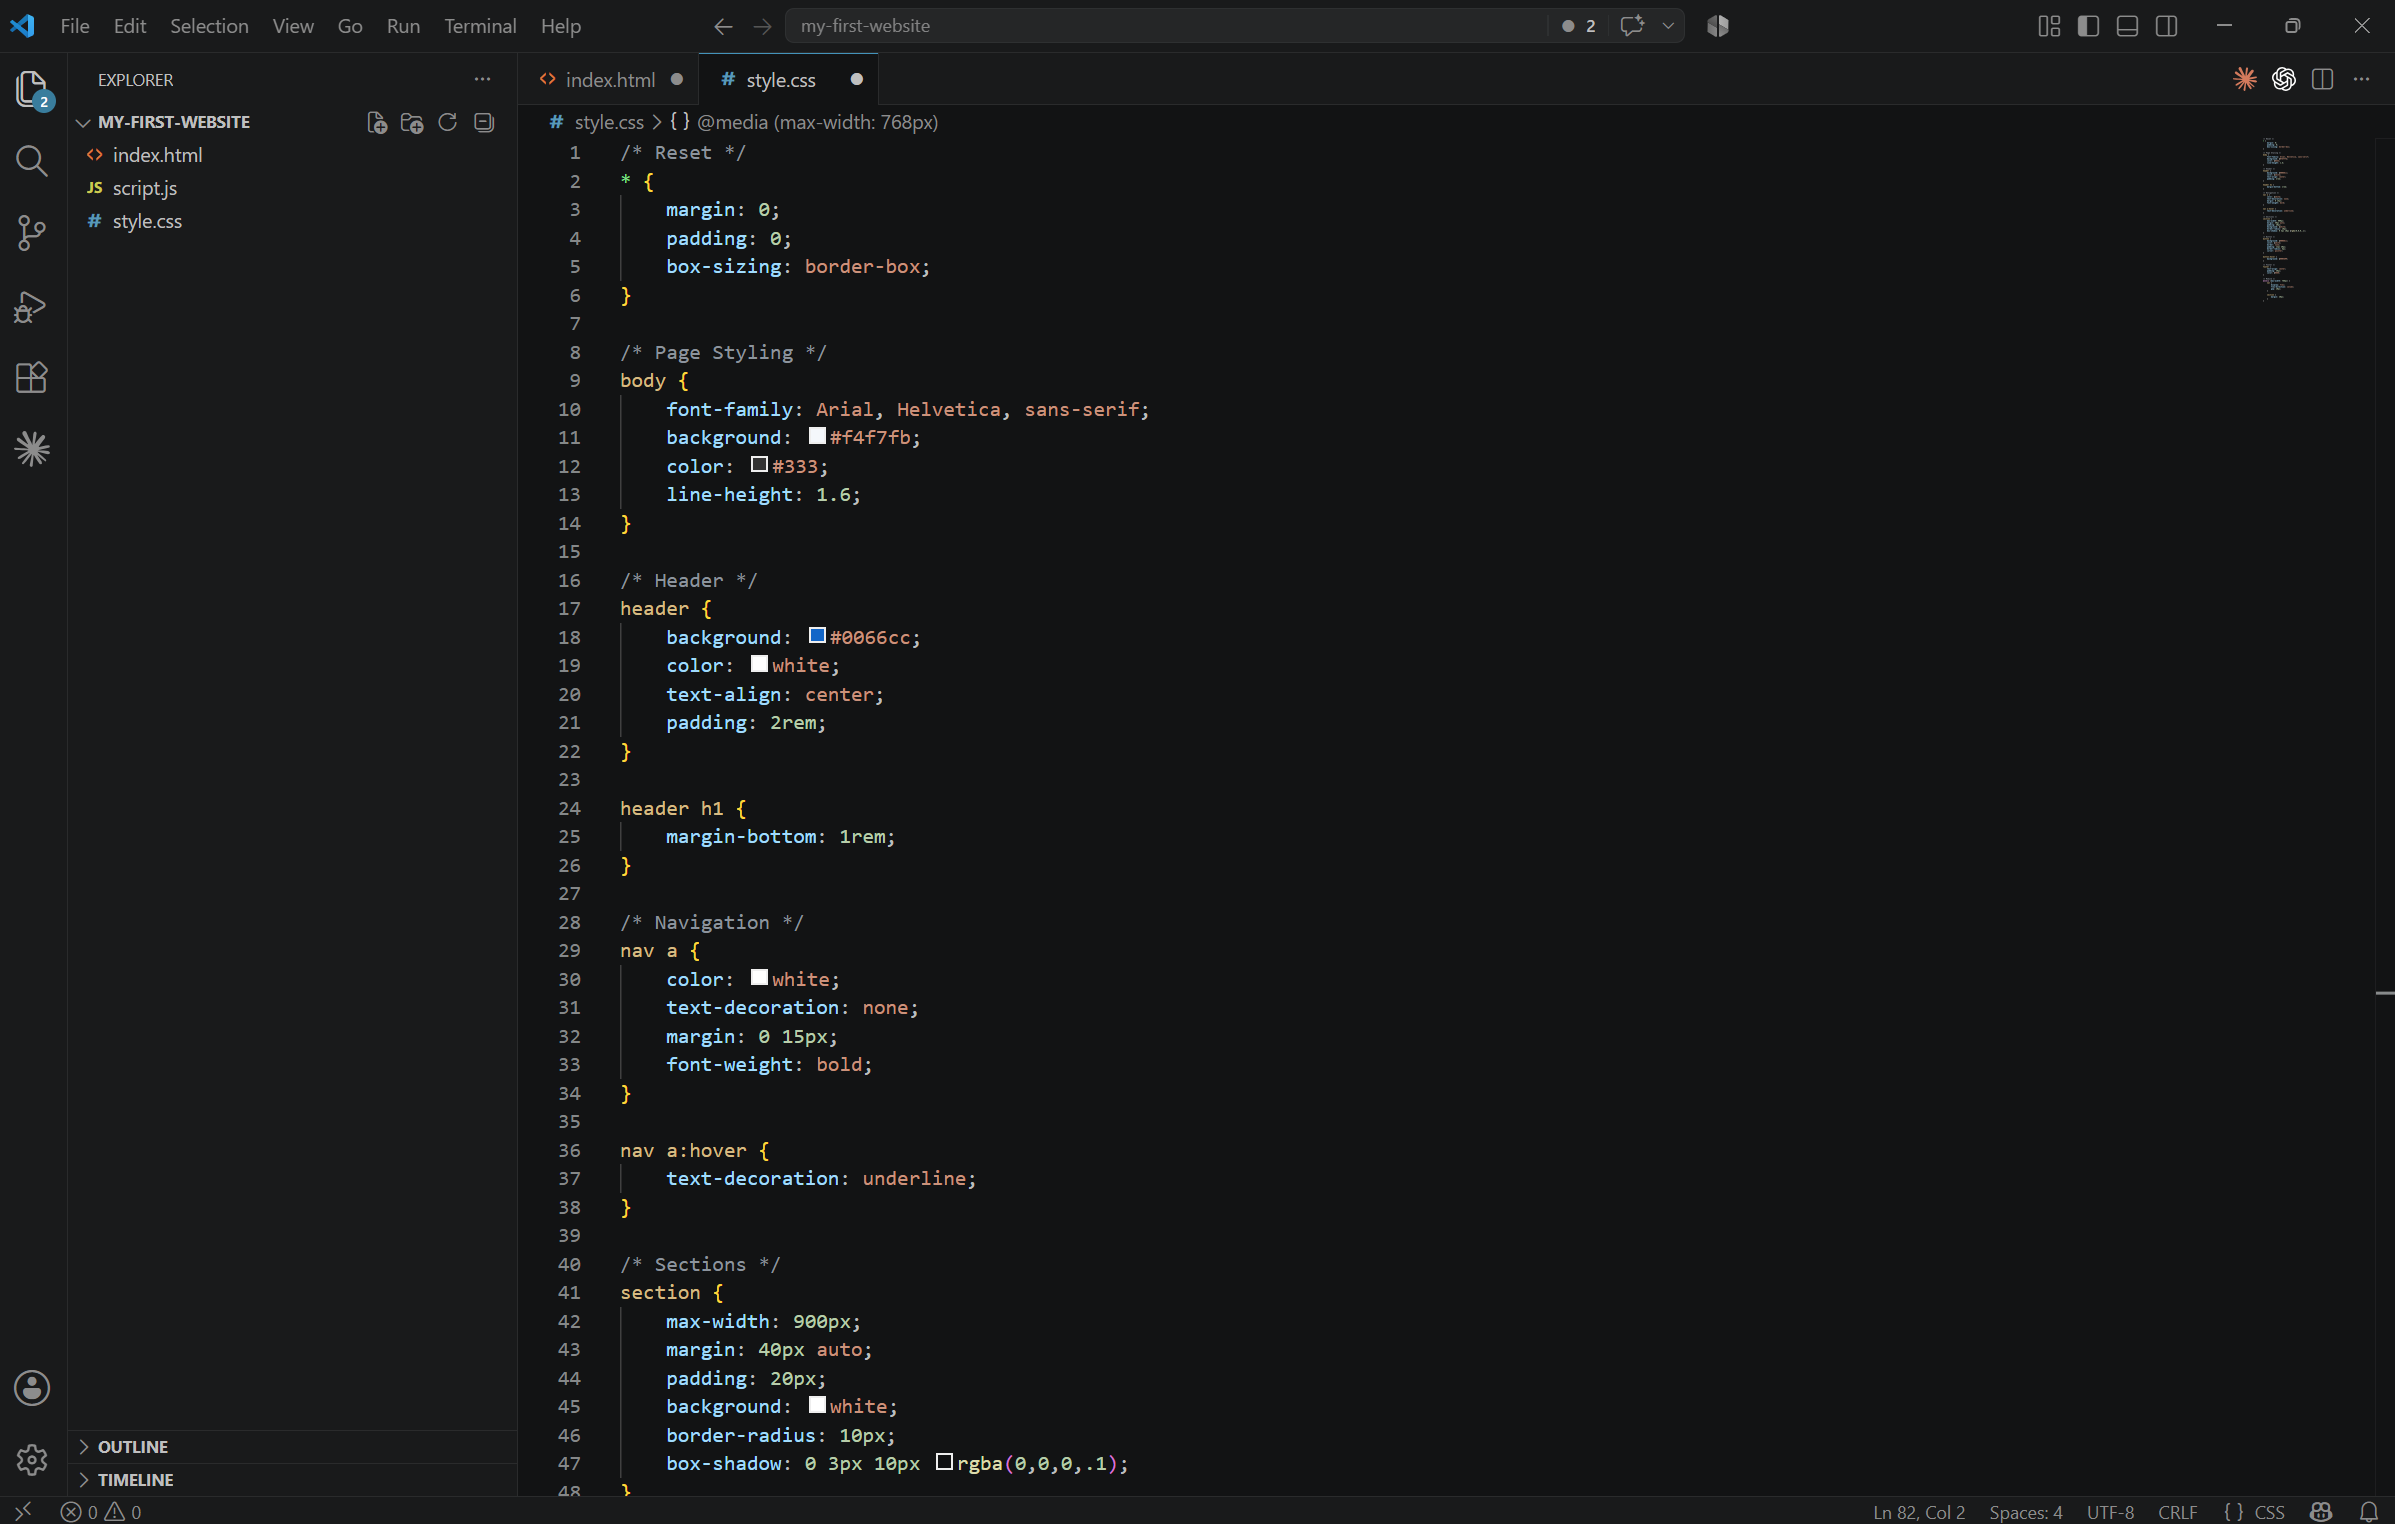
CSS stands for Cascading Style Sheets. It controls the visual design and layout of HTML content. The CSS below matches the HTML file exactly.
- Open style.css.
- Paste the complete CSS below.
- Save the file.
- Preview index.html again.
- Confirm the page now has spacing, colors, cards, and responsive layout.
*,
*::before,
*::after {
  box-sizing: border-box;
}

html {
  scroll-behavior: smooth;
}

body {
  margin: 0;
  font-family: Inter, ui-sans-serif, system-ui, -apple-system, BlinkMacSystemFont, "Segoe UI", sans-serif;
  line-height: 1.6;
  color: var(--color-text);
  background: var(--color-background);
}

:root {
  --color-background: #f8fafc;
  --color-surface: #ffffff;
  --color-muted: #eaf0f7;
  --color-text: #172033;
  --color-text-soft: #526179;
  --color-primary: #2563eb;
  --color-primary-dark: #1d4ed8;
  --color-border: #d8e0ea;
  --shadow-soft: 0 18px 45px rgba(23, 32, 51, 0.1);
}

body.dark-theme {
  --color-background: #0f172a;
  --color-surface: #172033;
  --color-muted: #111827;
  --color-text: #f8fafc;
  --color-text-soft: #cbd5e1;
  --color-primary: #60a5fa;
  --color-primary-dark: #93c5fd;
  --color-border: #334155;
  --shadow-soft: 0 18px 45px rgba(0, 0, 0, 0.3);
}

img {
  max-width: 100%;
  display: block;
}

a {
  color: inherit;
}

.container {
  width: min(100% - 2rem, 1120px);
  margin-inline: auto;
}

.narrow {
  max-width: 760px;
}

.skip-link {
  position: absolute;
  top: 1rem;
  left: 1rem;
  z-index: 10;
  padding: 0.75rem 1rem;
  background: var(--color-text);
  color: var(--color-background);
  border-radius: 0.5rem;
  transform: translateY(-150%);
}

.skip-link:focus {
  transform: translateY(0);
}

.site-header {
  position: sticky;
  top: 0;
  z-index: 5;
  background: color-mix(in srgb, var(--color-background) 92%, transparent);
  border-bottom: 1px solid var(--color-border);
  backdrop-filter: blur(16px);
}

.header-inner {
  min-height: 4.5rem;
  display: flex;
  align-items: center;
  gap: 1rem;
  justify-content: space-between;
}

.brand {
  font-weight: 800;
  font-size: 1.05rem;
  text-decoration: none;
}

.site-nav {
  display: flex;
  align-items: center;
  gap: 1rem;
}

.site-nav a,
.footer-inner a,
.text-link {
  color: var(--color-text-soft);
  text-decoration: none;
  font-weight: 700;
}

.site-nav a:hover,
.footer-inner a:hover,
.text-link:hover {
  color: var(--color-primary);
}

.menu-button,
.theme-button,
.button {
  min-height: 44px;
  border-radius: 0.65rem;
  border: 1px solid var(--color-border);
  font: inherit;
  font-weight: 800;
  cursor: pointer;
}

.menu-button {
  display: none;
  padding: 0.55rem 0.85rem;
  background: var(--color-surface);
  color: var(--color-text);
}

.theme-button {
  padding: 0.55rem 0.85rem;
  background: var(--color-surface);
  color: var(--color-text);
}

.button {
  display: inline-flex;
  align-items: center;
  justify-content: center;
  padding: 0.8rem 1rem;
  text-decoration: none;
}

.primary-button {
  border-color: var(--color-primary);
  background: var(--color-primary);
  color: white;
}

.primary-button:hover {
  background: var(--color-primary-dark);
}

.secondary-button {
  background: var(--color-surface);
  color: var(--color-primary);
}

.section {
  padding-block: clamp(4rem, 8vw, 7rem);
}

.muted-section {
  background: var(--color-muted);
}

.hero {
  padding-top: clamp(5rem, 10vw, 8rem);
}

.hero-grid,
.work-grid {
  display: grid;
  grid-template-columns: minmax(0, 1.15fr) minmax(280px, 0.85fr);
  gap: clamp(2rem, 6vw, 5rem);
  align-items: center;
}

.eyebrow,
.card-label {
  margin: 0 0 0.75rem;
  color: var(--color-primary);
  font-size: 0.8rem;
  font-weight: 900;
  letter-spacing: 0.12em;
  text-transform: uppercase;
}

h1,
h2,
h3,
p {
  margin-top: 0;
}

h1 {
  max-width: 760px;
  margin-bottom: 1rem;
  font-size: clamp(2.5rem, 7vw, 5rem);
  line-height: 1;
  letter-spacing: -0.03em;
}

h2 {
  margin-bottom: 1rem;
  font-size: clamp(2rem, 4vw, 3rem);
  line-height: 1.1;
}

h3 {
  margin-bottom: 0.6rem;
}

.hero-copy,
.section p {
  color: var(--color-text-soft);
  font-size: 1.05rem;
}

.hero-actions {
  display: flex;
  flex-wrap: wrap;
  align-items: center;
  gap: 1rem;
  margin-top: 1.5rem;
}

.hero-card,
.feature-card,
.cta-box {
  background: var(--color-surface);
  border: 1px solid var(--color-border);
  border-radius: 1rem;
  box-shadow: var(--shadow-soft);
}

.hero-card {
  padding: clamp(1.5rem, 4vw, 2.5rem);
}

.hero-card ul {
  margin: 0;
  padding-left: 1.25rem;
  color: var(--color-text-soft);
}

.section-heading {
  max-width: 680px;
  margin-bottom: 2rem;
}

.feature-grid {
  display: grid;
  grid-template-columns: repeat(3, minmax(0, 1fr));
  gap: 1rem;
}

.feature-card {
  padding: 1.5rem;
}

.work-list {
  display: grid;
  gap: 1rem;
}

.cta-section {
  padding-block: 4rem;
}

.cta-box {
  padding: clamp(1.5rem, 5vw, 3rem);
  text-align: center;
}

.site-footer {
  border-top: 1px solid var(--color-border);
  padding-block: 1.5rem;
}

.footer-inner {
  display: flex;
  flex-wrap: wrap;
  gap: 1rem;
  justify-content: space-between;
  align-items: center;
}

.interaction-message {
  min-height: 1.5rem;
  margin-top: 1rem;
  color: var(--color-primary);
  font-weight: 800;
}

:focus-visible {
  outline: 3px solid var(--color-primary);
  outline-offset: 3px;
}

@media (max-width: 760px) {
  .header-inner {
    flex-wrap: wrap;
  }

  .menu-button {
    display: inline-flex;
    align-items: center;
  }

  .site-nav {
    display: none;
    width: 100%;
    flex-direction: column;
    align-items: stretch;
    padding: 0 0 1rem;
  }

  .site-nav.is-open {
    display: flex;
  }

  .site-nav a {
    padding: 0.75rem 0;
  }

  .theme-button {
    margin-left: auto;
  }

  .hero-grid,
  .work-grid,
  .feature-grid {
    grid-template-columns: 1fr;
  }
}

@media (prefers-reduced-motion: reduce) {
  *,
  *::before,
  *::after {
    scroll-behavior: auto !important;
    transition-duration: 0.01ms !important;
    animation-duration: 0.01ms !important;
  }
}
Understand Selectors and Classes#
An element selector targets an HTML element such as body or h1. A class selector starts with a period, such as .container. An ID selector starts with a number sign, such as #contact.
Use CSS Custom Properties#
CSS custom properties are reusable values. A variable such as --color-primary stores a color once so it can be used in many places.
--color-primary: #2563eb;Understand Margin and Padding#
| Property | Controls |
|---|---|
| Margin | Space outside an element |
| Padding | Space inside an element |
Build Layouts with Flexbox and Grid#
| Flexbox | CSS Grid |
|---|---|
| Best for one-dimensional layouts | Best for rows and columns |
| Useful for navigation | Useful for card layouts |
Create Responsive Design#
A media query applies CSS only under certain conditions. This project uses a max-width media query to change navigation and card layouts on smaller screens.
Create Visible Focus States#
Keyboard users need to see which link or button is active. The :focus-visible rule creates a clear outline when someone tabs through the page.
Support Reduced Motion#
The prefers-reduced-motion media query respects people who reduce motion in their operating-system settings.
Add Dark Mode#
The dark-theme class changes color variables on the body element. JavaScript will add and remove that class when the reader selects the theme button.
Add Interactivity with JavaScript#
Add mobile navigation, dark mode, footer year, and a simple call-to-action interaction.
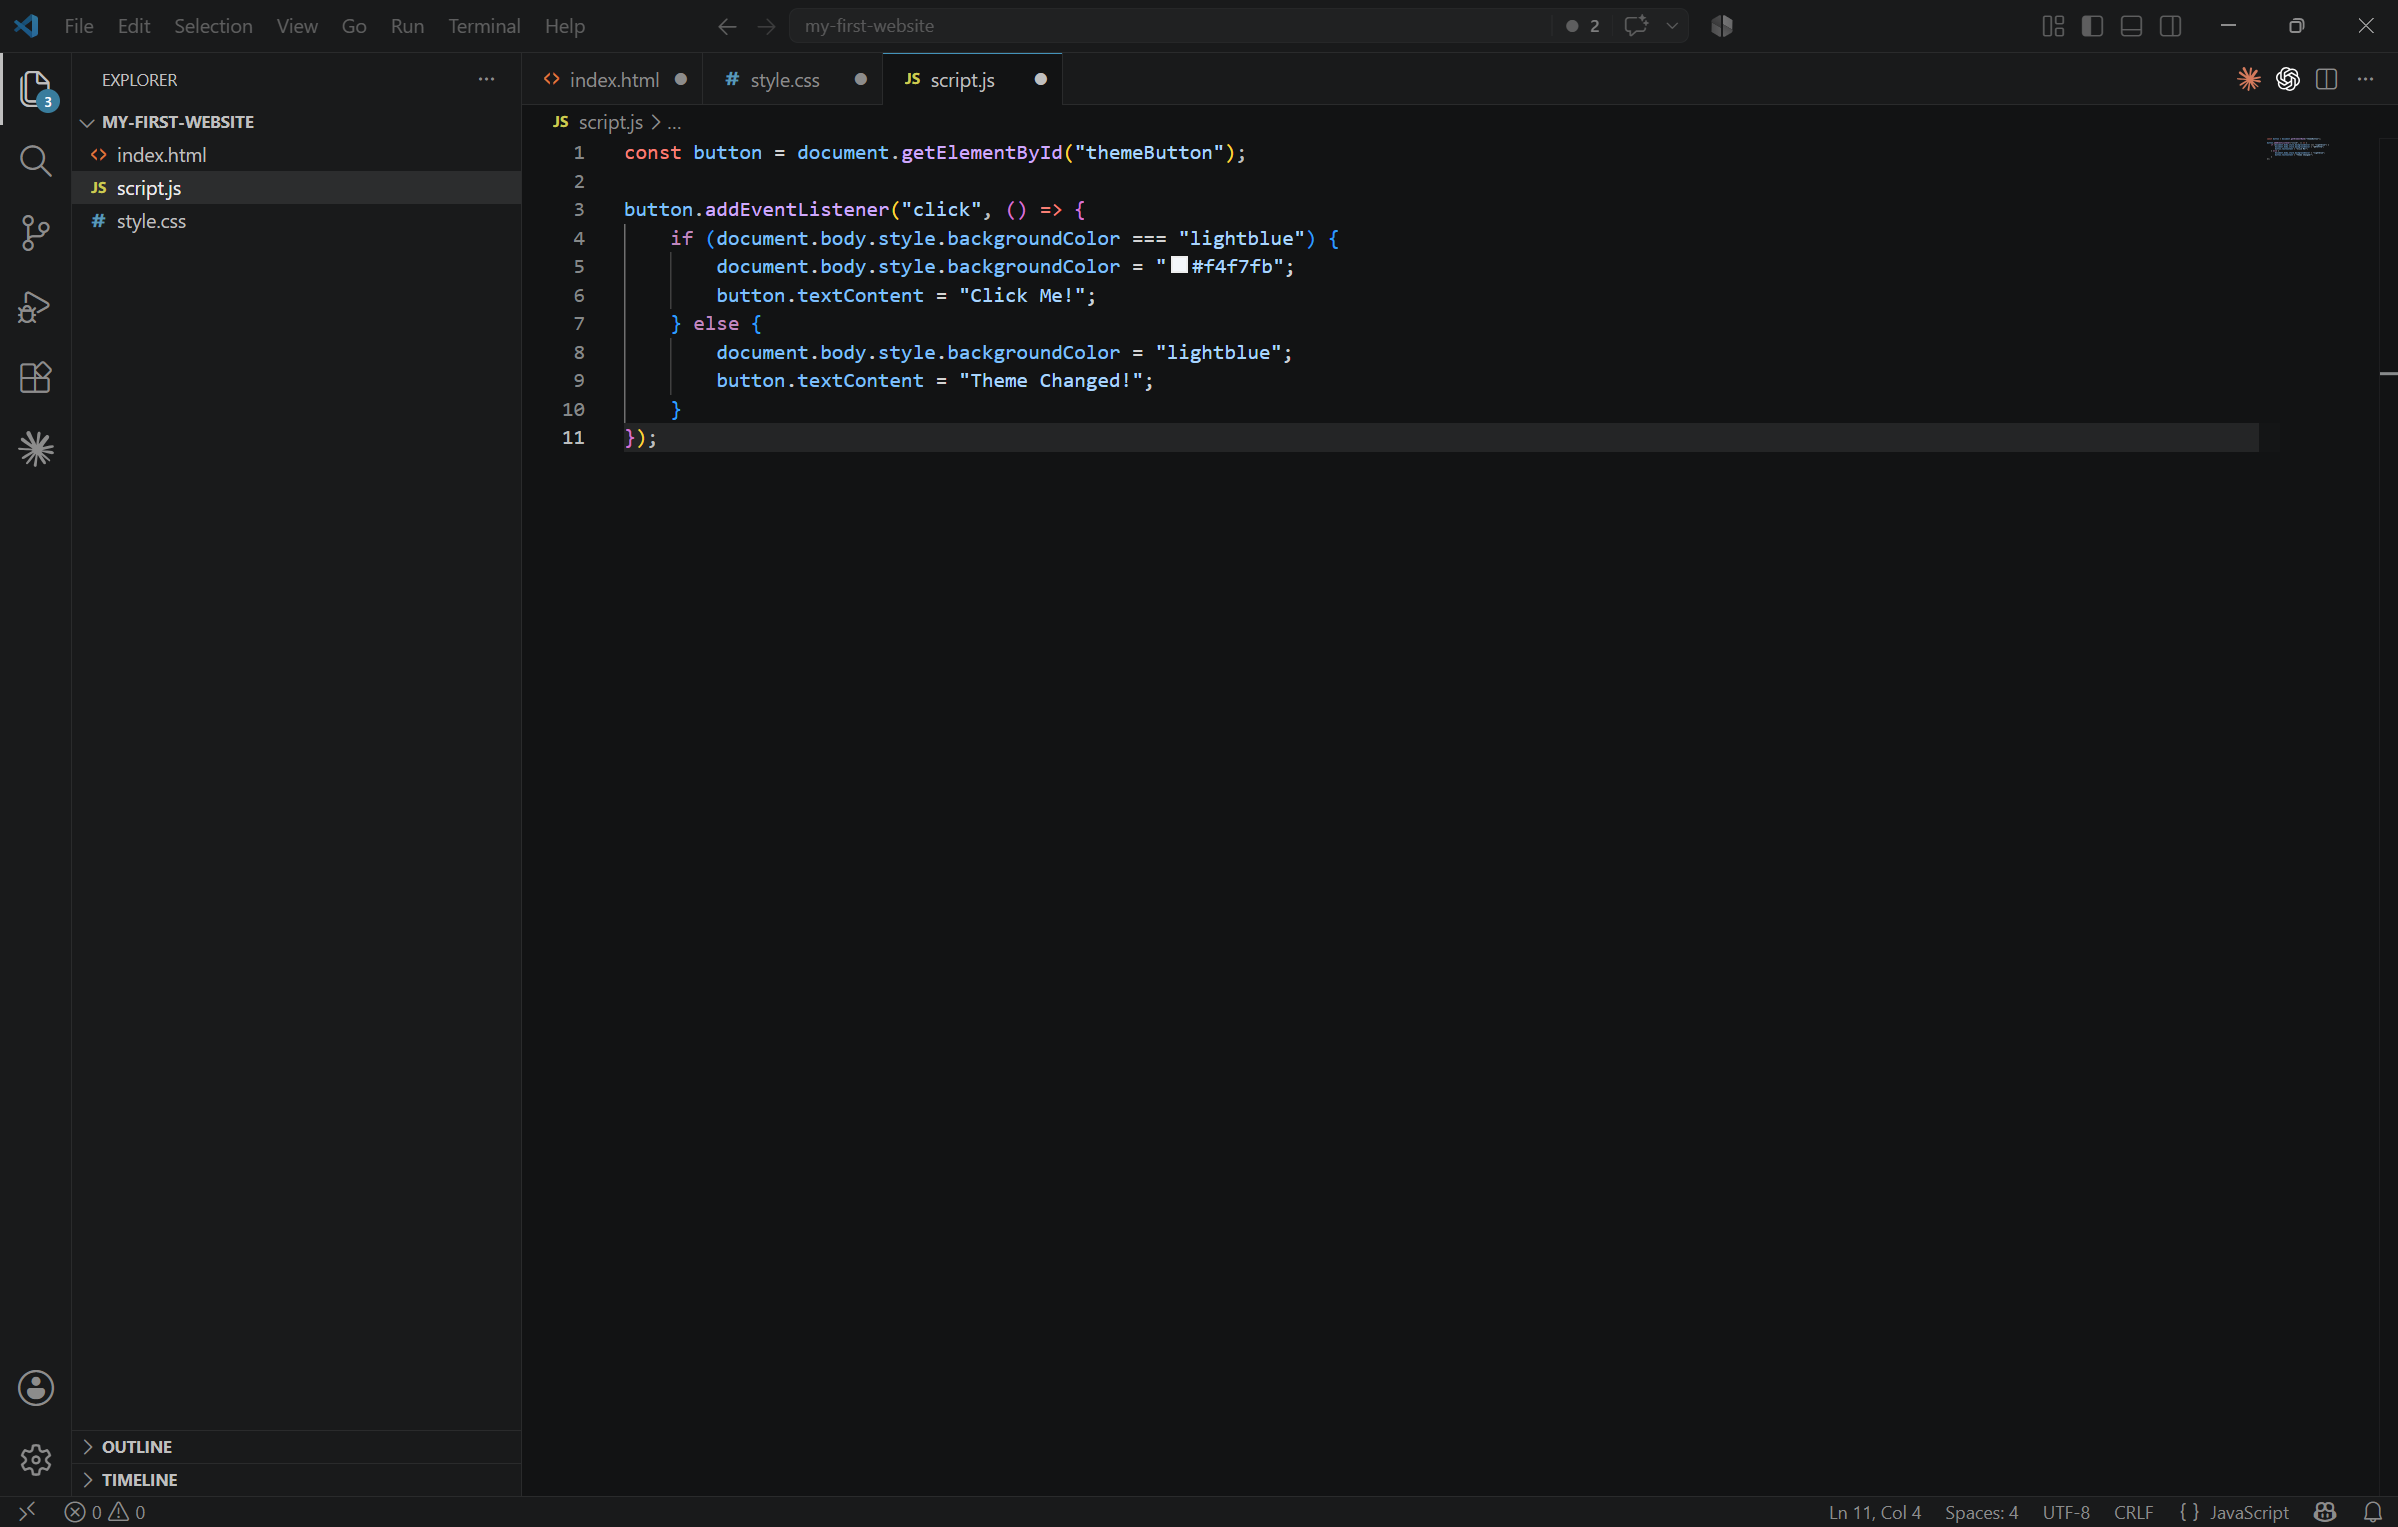
JavaScript adds behavior to a webpage. It can respond to button selections, update content, and remember simple preferences. This file uses readable names and defensive checks so missing optional elements do not cause errors.
- Open script.js.
- Paste the complete JavaScript below.
- Save the file.
- Preview the page with a browser.
- Test the menu button, dark-mode button, footer year, and encouragement button.
const menuButton = document.querySelector(".menu-button");
const siteNavigation = document.querySelector("#site-navigation");
const themeButton = document.querySelector(".theme-button");
const currentYear = document.querySelector("#current-year");
const encouragementButton = document.querySelector("#encouragement-button");
const ctaMessage = document.querySelector("#cta-message");

function closeMenu() {
  if (!menuButton || !siteNavigation) {
    return;
  }

  siteNavigation.classList.remove("is-open");
  menuButton.setAttribute("aria-expanded", "false");
}

function setTheme(theme) {
  const isDark = theme === "dark";
  document.body.classList.toggle("dark-theme", isDark);

  if (themeButton) {
    themeButton.textContent = isDark ? "Light mode" : "Dark mode";
    themeButton.setAttribute(
      "aria-label",
      isDark ? "Switch to light mode" : "Switch to dark mode"
    );
  }

  localStorage.setItem("brightpath-theme", theme);
}

if (menuButton && siteNavigation) {
  menuButton.addEventListener("click", () => {
    const isOpen = siteNavigation.classList.toggle("is-open");
    menuButton.setAttribute("aria-expanded", String(isOpen));
  });

  siteNavigation.querySelectorAll("a").forEach((link) => {
    link.addEventListener("click", closeMenu);
  });
}

if (themeButton) {
  const savedTheme = localStorage.getItem("brightpath-theme");
  const prefersDark = window.matchMedia("(prefers-color-scheme: dark)").matches;
  setTheme(savedTheme || (prefersDark ? "dark" : "light"));

  themeButton.addEventListener("click", () => {
    const nextTheme = document.body.classList.contains("dark-theme") ? "light" : "dark";
    setTheme(nextTheme);
  });
}

if (currentYear) {
  currentYear.textContent = String(new Date().getFullYear());
}

if (encouragementButton && ctaMessage) {
  encouragementButton.addEventListener("click", () => {
    ctaMessage.textContent = "You are ready for the next step: save, commit, and deploy.";
  });
}
Select Page Elements#
document.querySelector finds the first matching element on the page. The selector must match the HTML exactly.
Store Values in Variables#
A variable stores a value so you can use it later. In this file, variables store buttons, navigation, and text areas.
Listen for User Actions#
An event listener waits for something to happen. The click event runs code when the reader selects a button or link.
Run Reusable Code with Functions#
A function groups steps that can run more than once. The closeMenu and setTheme functions keep repeated logic in one place.
Change Classes or Attributes#
JavaScript changes visual state by adding or removing classes. It also updates aria-expanded so assistive technologies know whether the mobile navigation is open.
Save a Theme Preference#
localStorage saves a small value in the browser. This project stores the theme choice so the page can restore it later.
Update Text#
textContent changes text safely. The current year and encouragement message both use textContent.
Preview the Website with Live Server#
Install Live Server and use a local development URL to preview the site.
A VS Code extension adds features to the editor. Live Server starts a small local development server and refreshes the browser after files are saved.
- Open the Extensions panel.
- Search for Live Server.
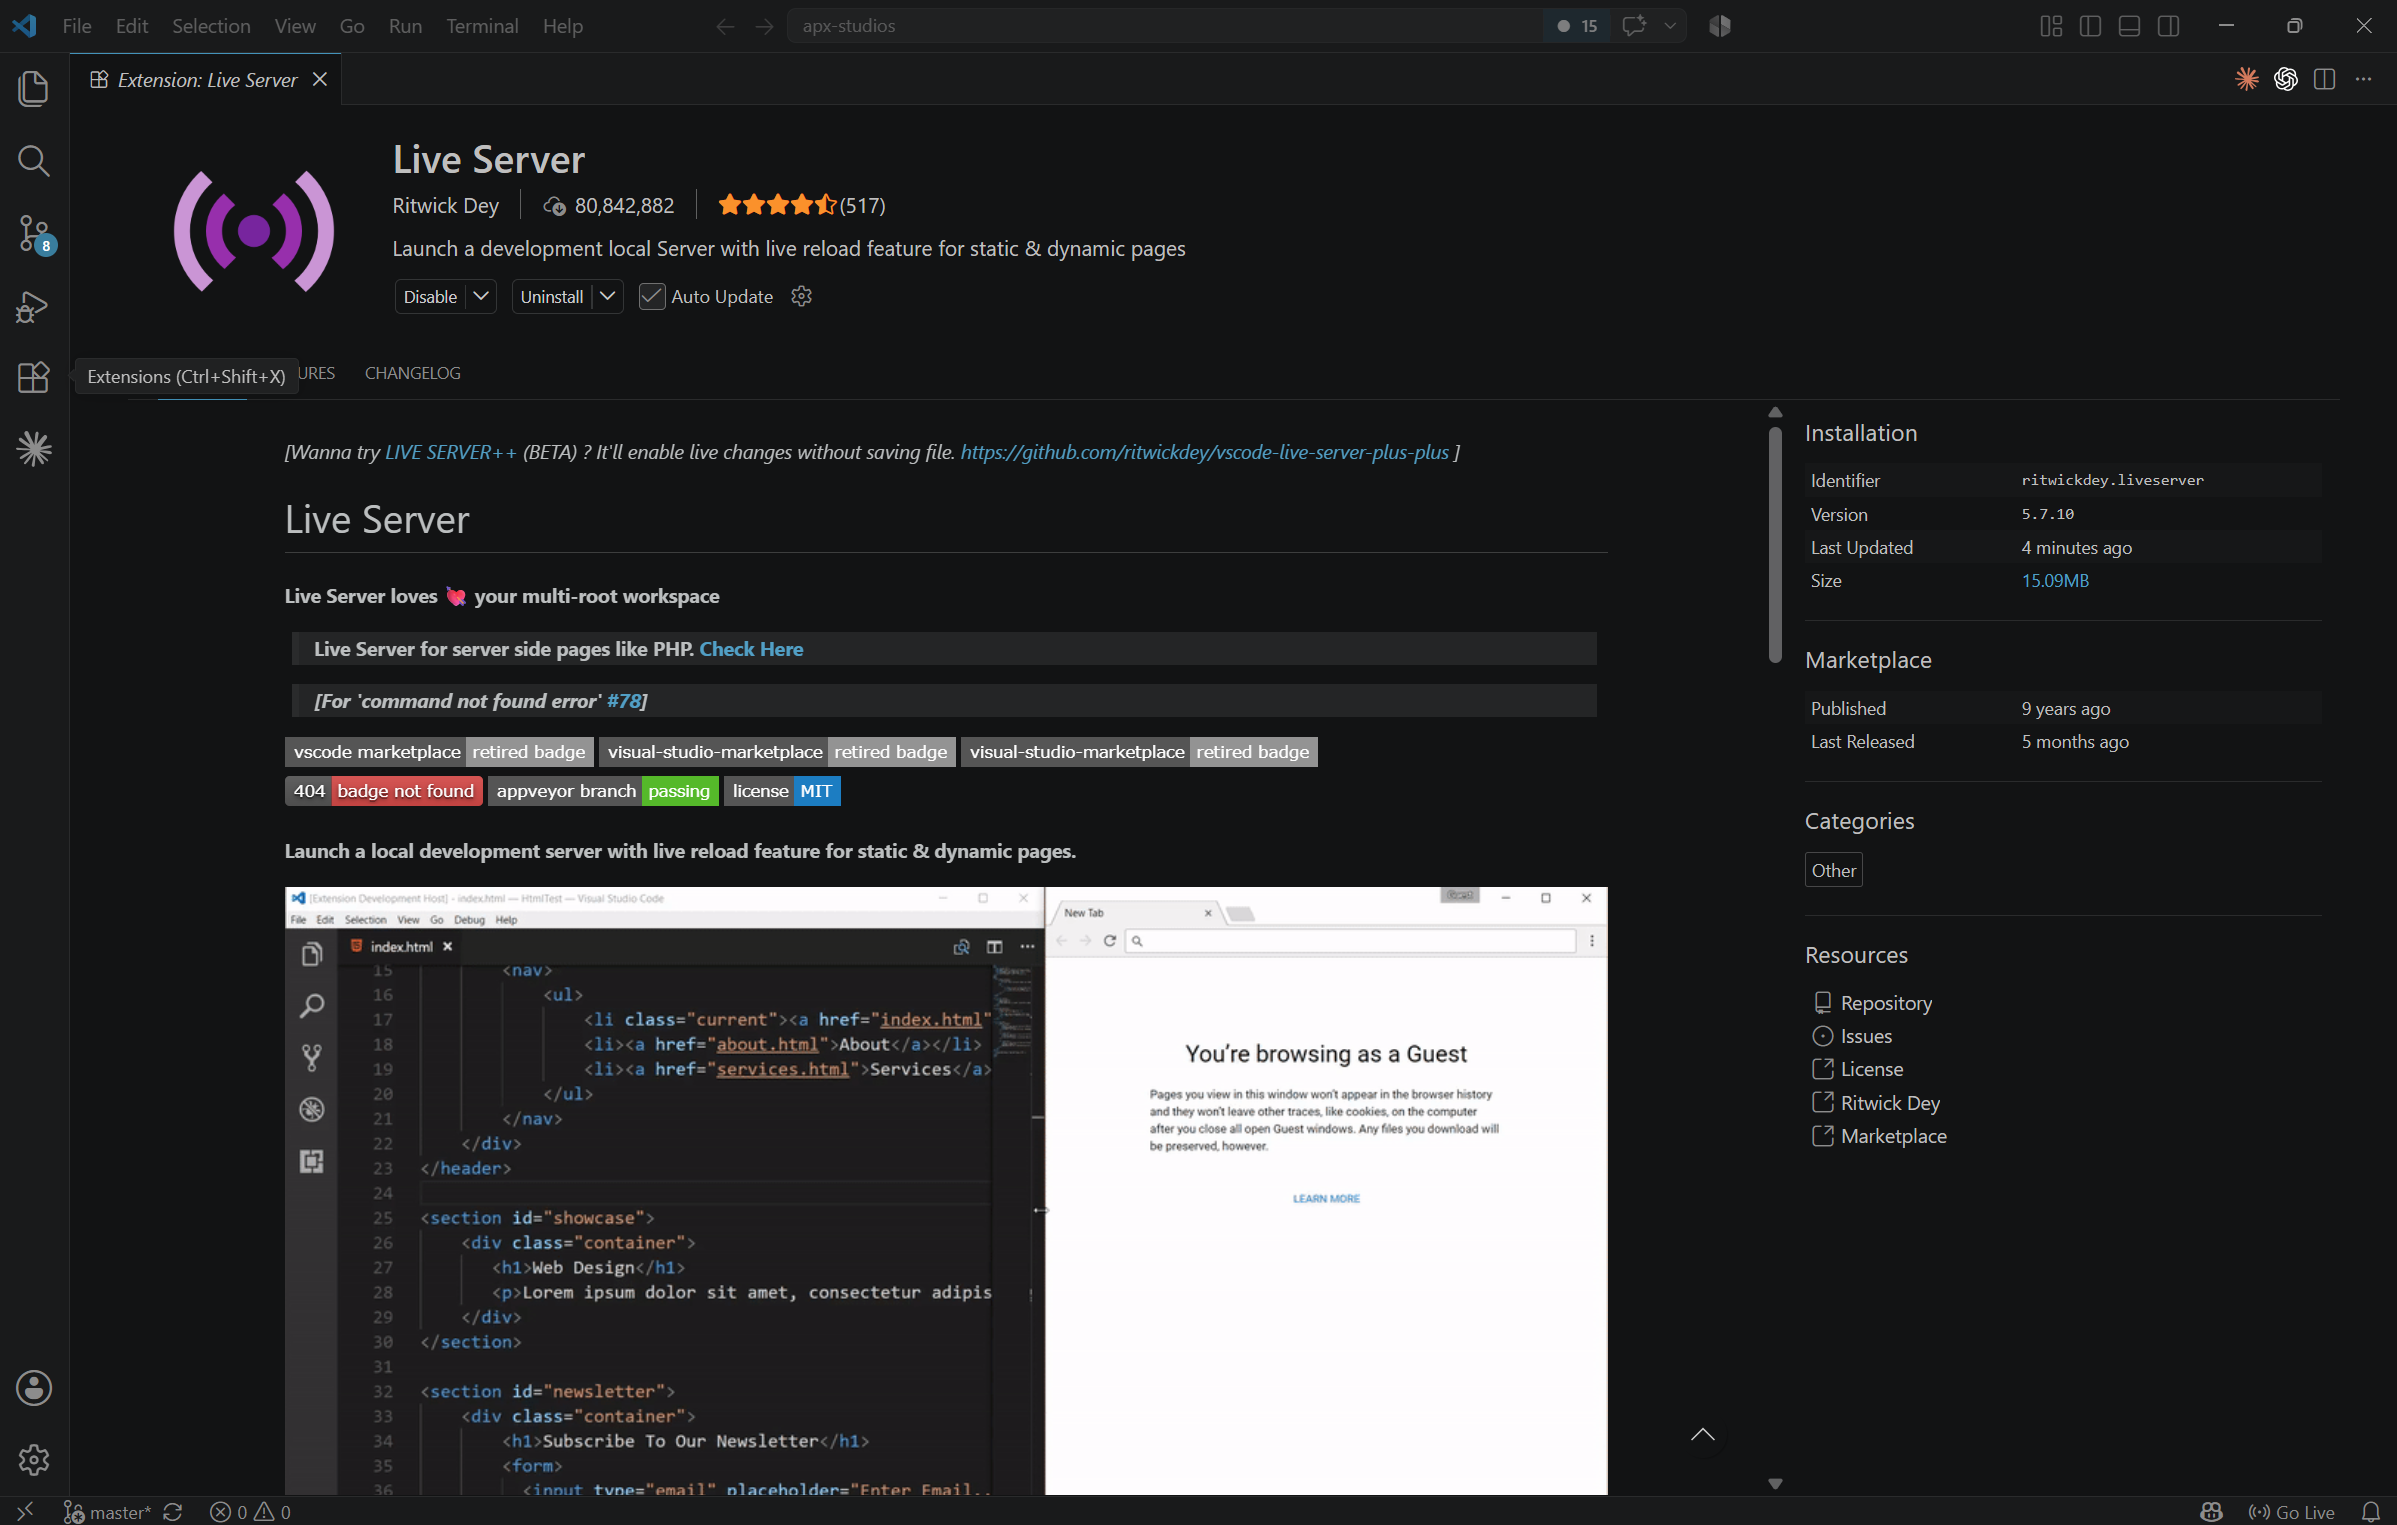
- Verify the extension name and publisher.
- Install the extension.
- Open index.html.
- Select Go Live or the matching Live Server command.
- Allow the browser to open.
- Verify that the BrightPath Studio page appears.
Localhost means your own computer. Local development means previewing the project before it is public. A port number identifies the local server connection. Live Server may show a URL similar to the example below, but your port may be different.
http://127.0.0.1:5500/Save files before checking changes. To stop Live Server, use the status bar control or the Live Server stop command.
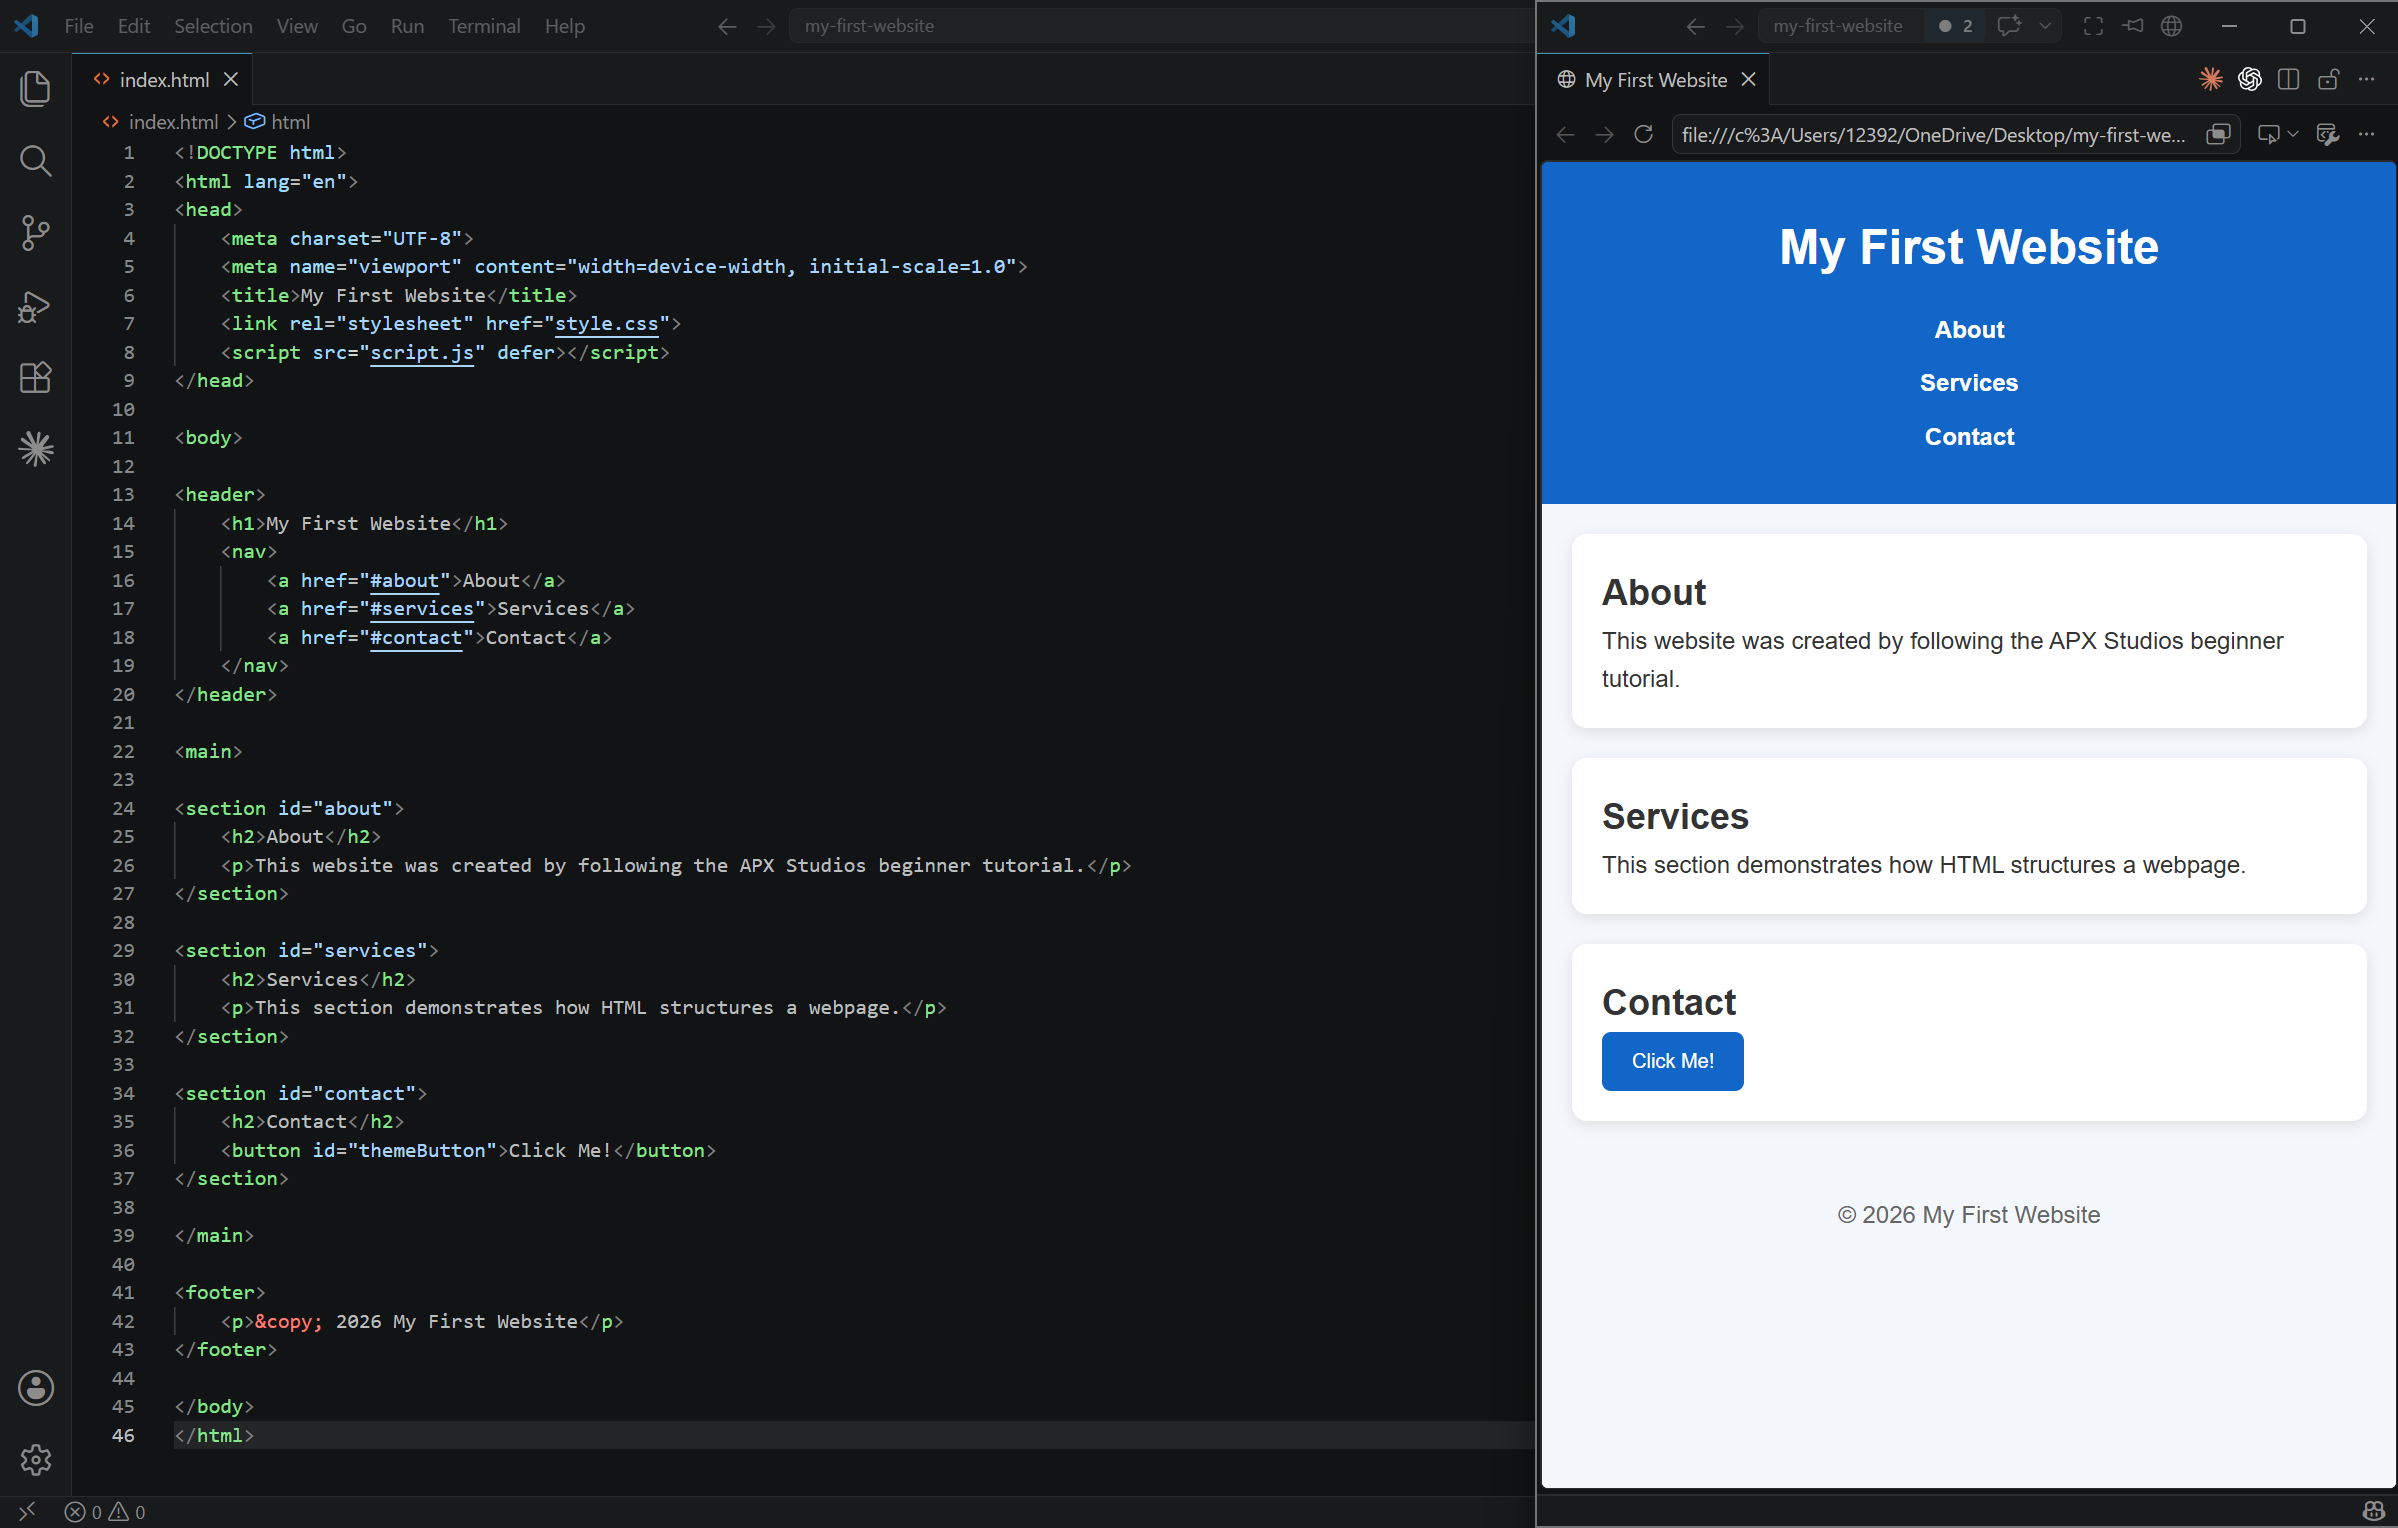
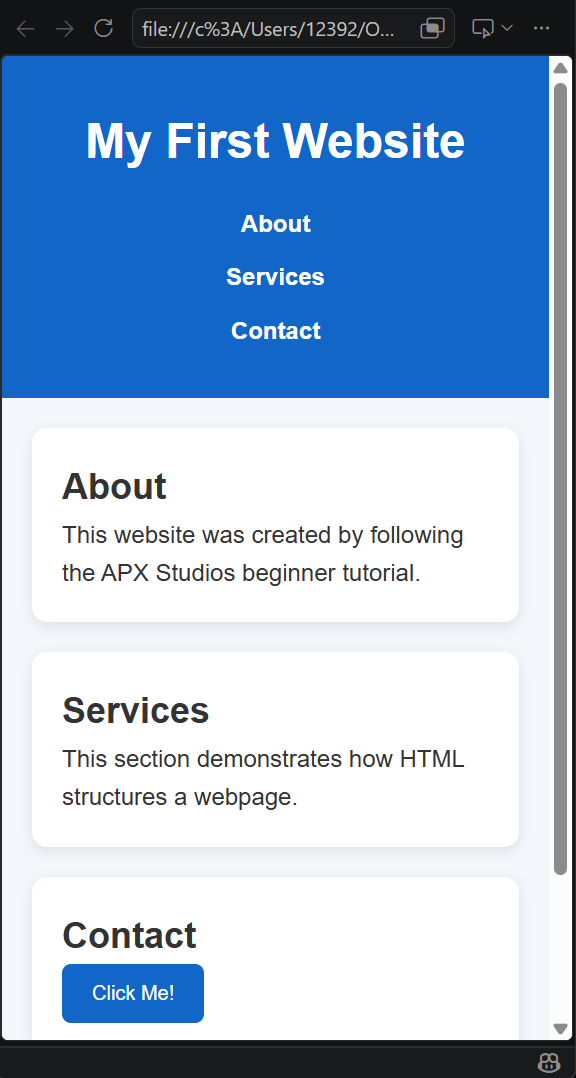
Test the page at a narrow browser width to confirm the layout stacks cleanly and the mobile navigation remains usable.
| Problem | What to check |
|---|---|
| Go Live button missing | Confirm Live Server is installed and index.html is open. |
| Browser does not open | Copy the local URL from VS Code and paste it into a browser. |
| Blank page | Confirm index.html contains the complete HTML and was saved. |
| Wrong folder | Open the my-first-website folder, not a parent folder. |
| Changes do not appear | Save the file and refresh the browser. |
| Port already in use | Stop the other local server or allow Live Server to use a different port. |
Understand the Git Workflow#
Learn the beginner Git terms you need before running commands.
Version control records changes over time. Git uses a few important terms that become easier once you connect them to the workflow.
Working Files -> Staging Area -> Local Commit -> GitHub -> Vercel| Term | Meaning | Beginner Analogy |
|---|---|---|
| Version control | A system for recording file changes. | A project history notebook. |
| Repository | A project folder plus recorded history. | A folder with a memory. |
| Working directory | The files you are editing now. | Your current desk. |
| Staging area | A review area for the next checkpoint. | Items placed in a review tray. |
| Commit | A labeled checkpoint. | A saved version with a note. |
| Branch | A line of work in Git. | A separate draft path. |
| Main branch | The primary branch for the project. | The main draft. |
| Remote repository | An online copy connected to the local project. | A cloud copy. |
| Push | Send commits to a remote repository. | Upload saved checkpoints. |
| Pull | Bring remote changes to your computer. | Download updates. |
| Clone | Copy a remote repository to your computer. | Make a local copy. |
| Merge | Combine branch changes. | Bring two draft paths together. |
Configure Your Git Identity#
Set the name and email Git records with each commit.
Git records a name and email with each commit so the project history shows who made each checkpoint. Use your own information.
git config --global user.name "Your Name"
git config --global user.email "your-email@example.com"
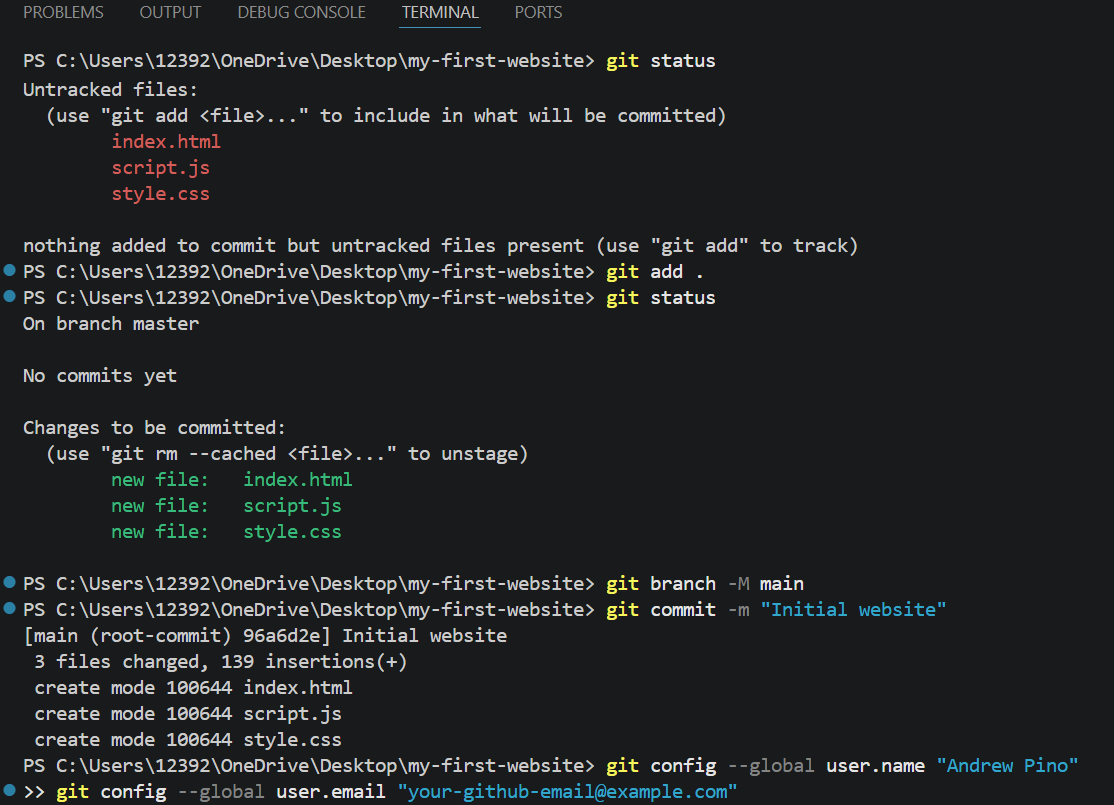
git config changes Git settings. --global applies the setting to your user account on this computer. Quotation marks keep names with spaces together. Replace the example values with your real name and email. The email normally matches your GitHub account email, but GitHub also offers private email options.
git config --global user.name
git config --global user.emailInitialize the Local Repository#
Turn my-first-website into a Git repository and inspect the status.
Open the terminal inside the my-first-website folder. In VS Code, check the Explorer folder name and the terminal path before running Git commands.
git initThis command creates a hidden .git directory. Existing project files are not changed. The project becomes a Git repository, but files are not automatically staged or committed.
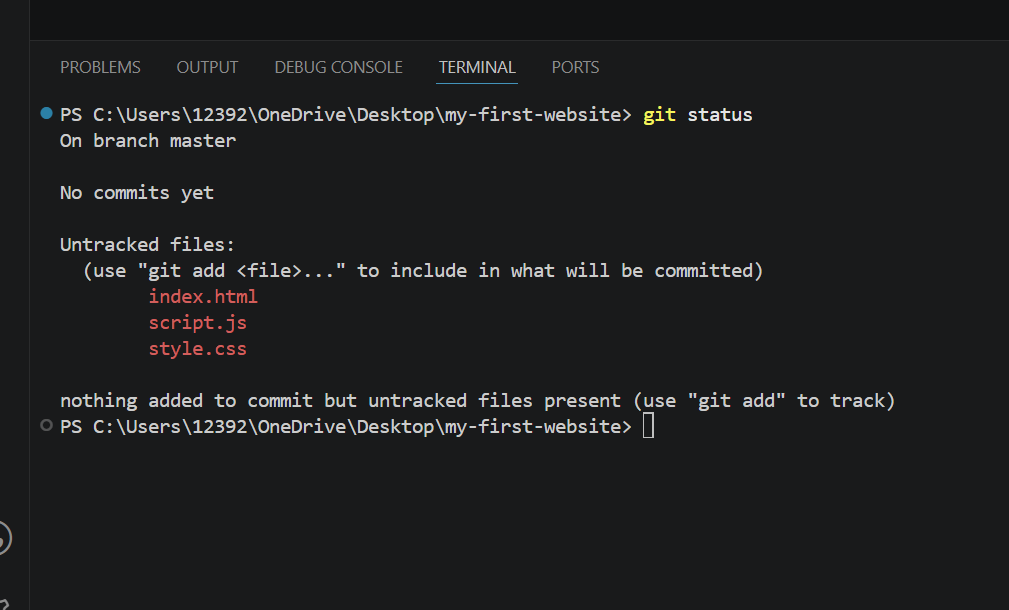
git statusgit status shows the current branch, untracked files, and working-tree status. Untracked files are files Git can see but has not added to version history yet.
Stage the Website Files#
Add the project files to Git's staging area before committing.
Staging lets you choose what goes into the next commit. This tutorial stages all files because the project folder contains only the website files.
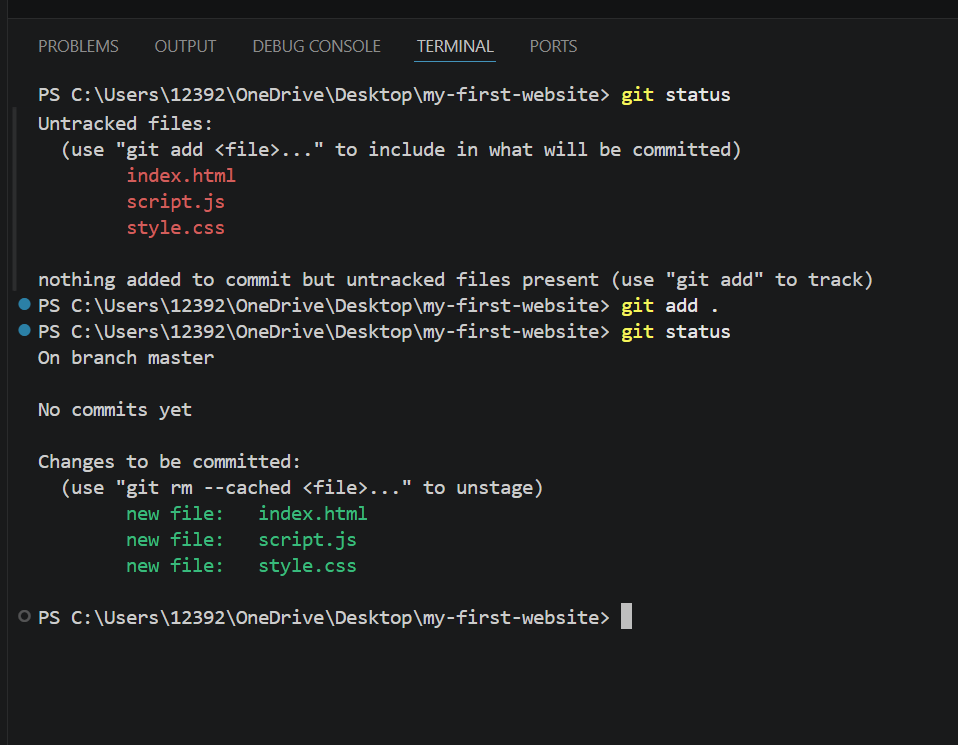
git add .git add stages files. The period means the current project folder. Git separates staging from committing so you can review what will be saved.
git statusThe status output should change from untracked files to changes to be committed.
Create the First Commit#
Save the first labeled checkpoint in the local Git history.
A commit is a saved checkpoint. The message explains what changed.
git commit -m "Initial website"git commit creates the checkpoint. -m lets you add the message in the same command. Git also creates a commit identifier, which is a unique label for that checkpoint.
git log --onelinegit log --oneline shows recent commits in a compact format. Look for the Initial website message.
Create the GitHub Repository#
Create an empty GitHub repository named my-first-website.
GitHub stores Git repositories online. If you do not already have an account, create one with an email address you can access.
- Sign in to GitHub.
- Open the new repository page.
- Enter my-first-website as the repository name.
- Add an optional description.
- Select Public or Private.
- Leave README initialization unchecked for this workflow.
- Leave .gitignore initialization disabled.
- Leave license initialization disabled.
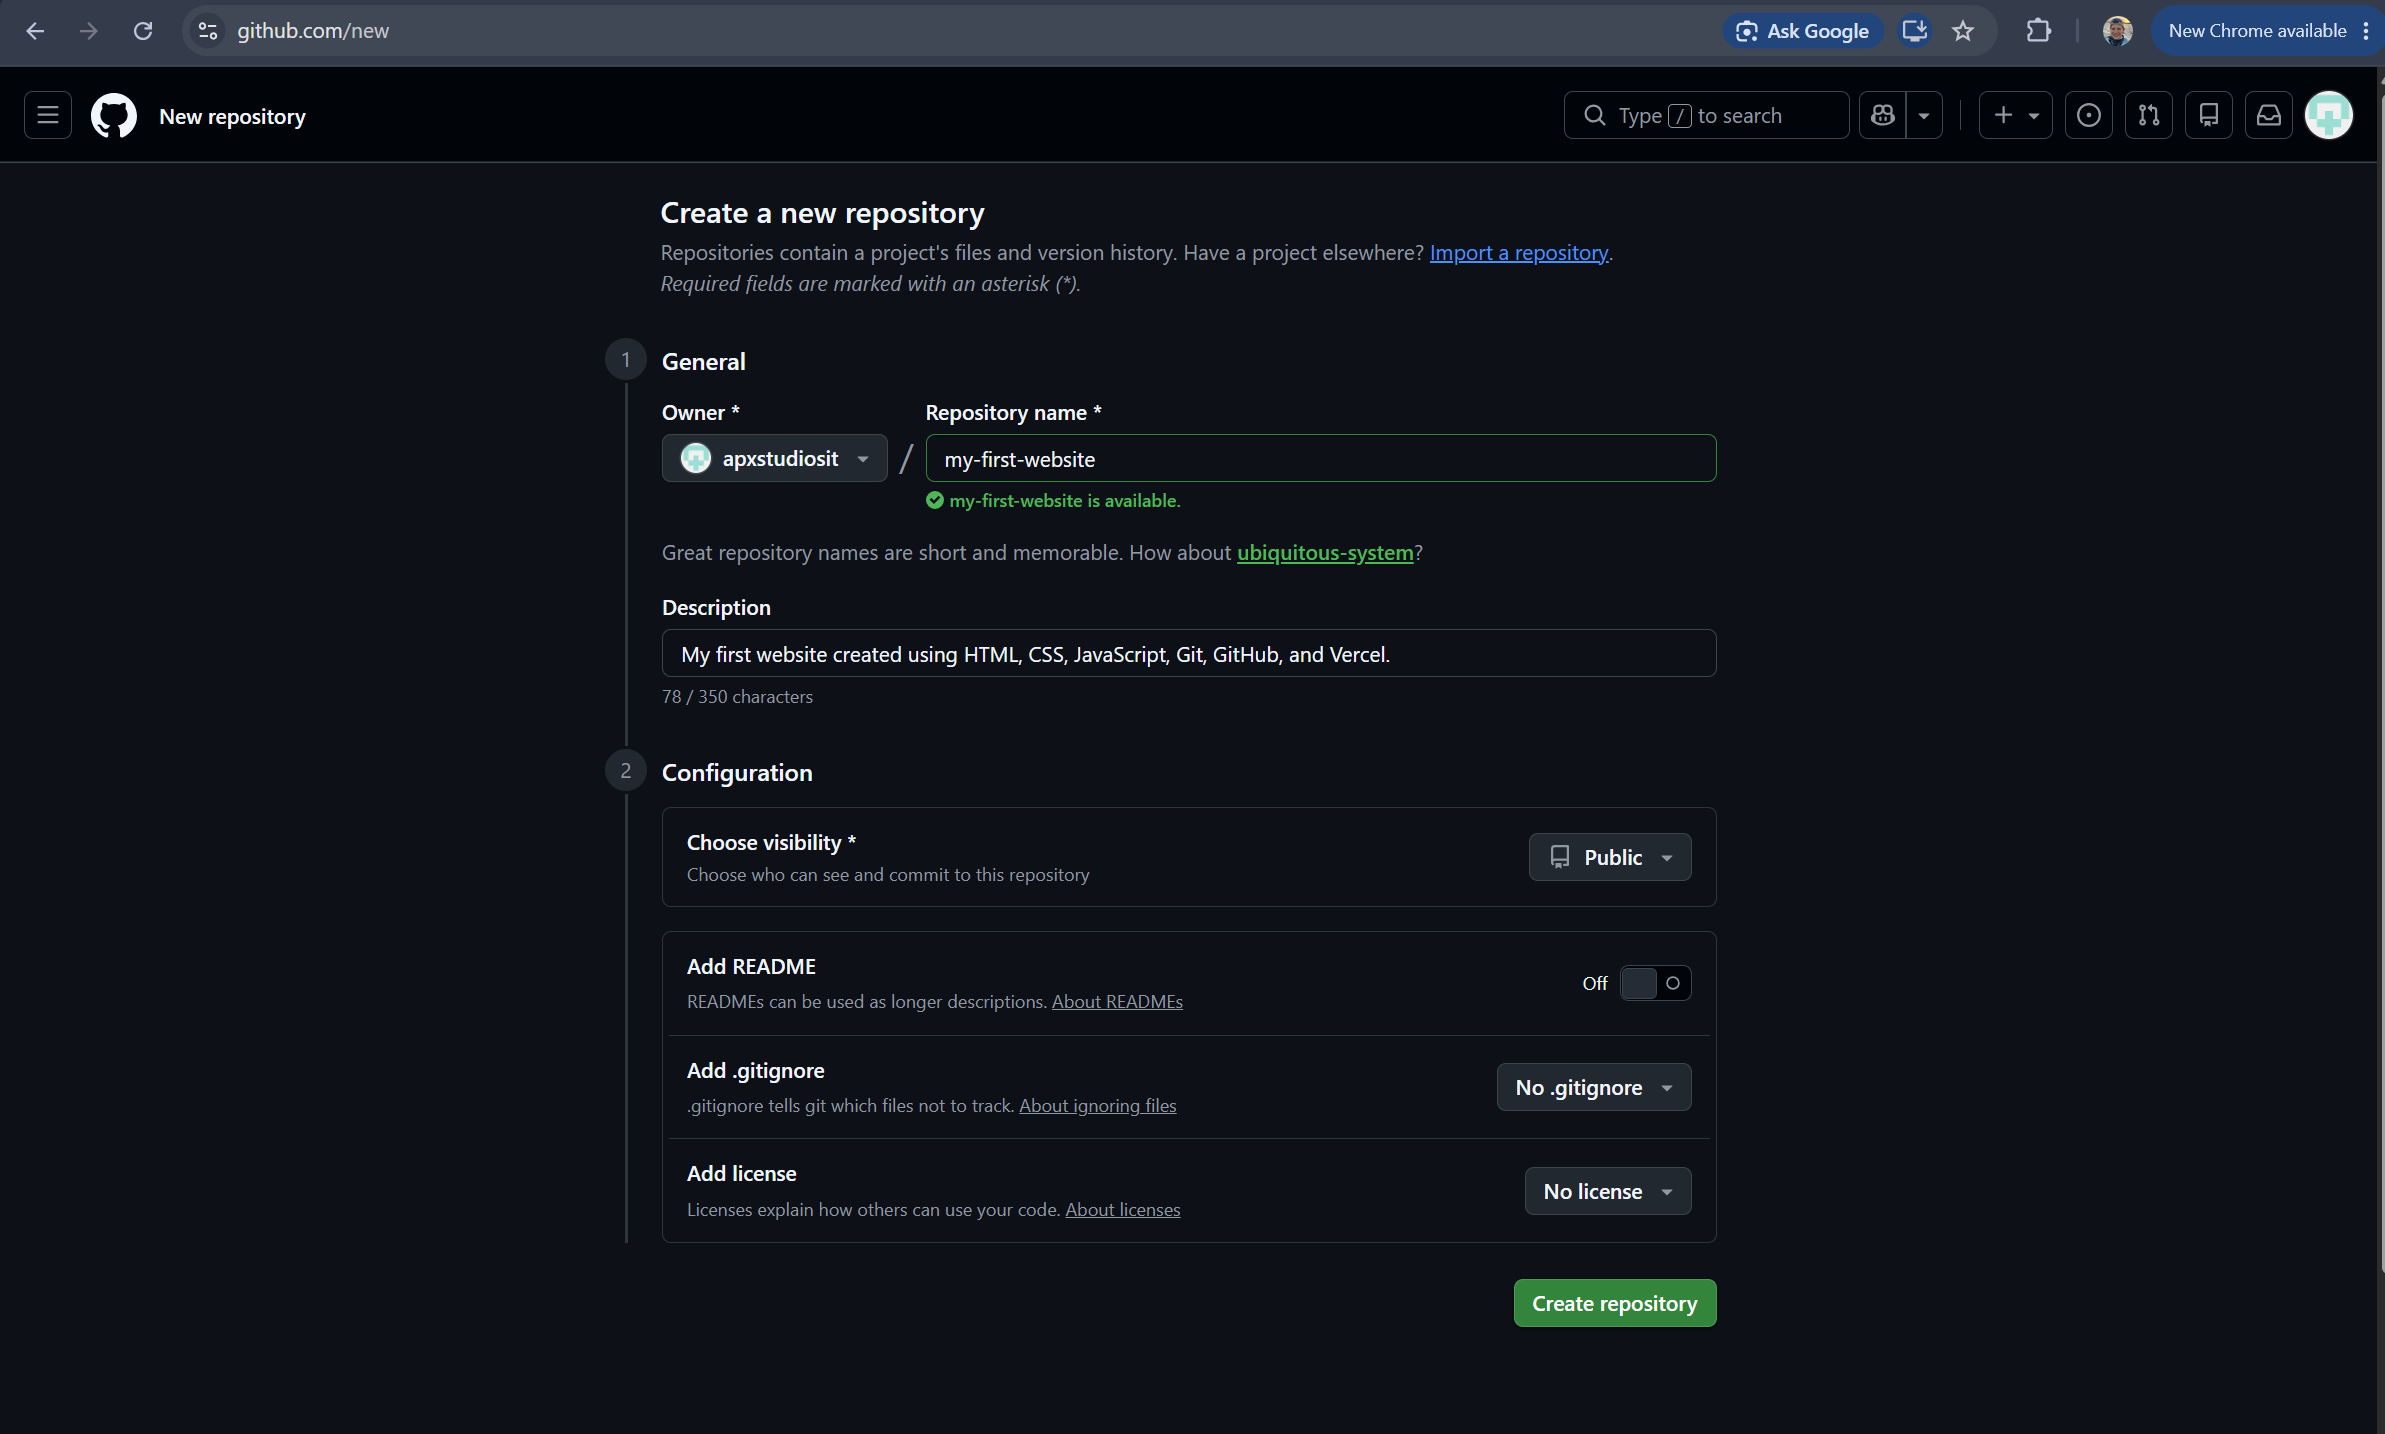
- Create the repository.
- Locate the repository URL.
| Repository visibility | What it means |
|---|---|
| Public | Other people can view the repository if they have the link or find it on GitHub. |
| Private | Only you and people you invite can view the repository. |
This workflow begins with an empty GitHub repository because your local project already has files and a commit.
https://github.com/YOUR-USERNAME/my-first-website.gitConnect the Local Repository to GitHub#
Connect your local Git repository to GitHub and push the first commit.
A remote repository is an online copy connected to your local project. The conventional remote name origin points to your main online repository.
git remote add origin https://github.com/YOUR-USERNAME/my-first-website.git
git branch -M main
git push -u origin main
git remote add origin connects the local repository to the GitHub repository URL. git branch -M main renames the active branch to main. git push -u origin main uploads the commit to GitHub and sets upstream tracking, so future pushes can normally use git push.
GitHub does not accept a normal GitHub account password for command-line Git pushes. You may be asked to sign in through a browser, authorize Git Credential Manager, or confirm your GitHub account.
Verify the Files on GitHub#
Confirm the uploaded files and commit history are visible on GitHub.
- Open the GitHub repository.
- Refresh the page.
- Confirm that the main branch is selected.
- Confirm that index.html, style.css, and script.js are listed.
- Open each file.
- Review the latest commit message.
- Open the commit history.
- Confirm that the initial commit appears.
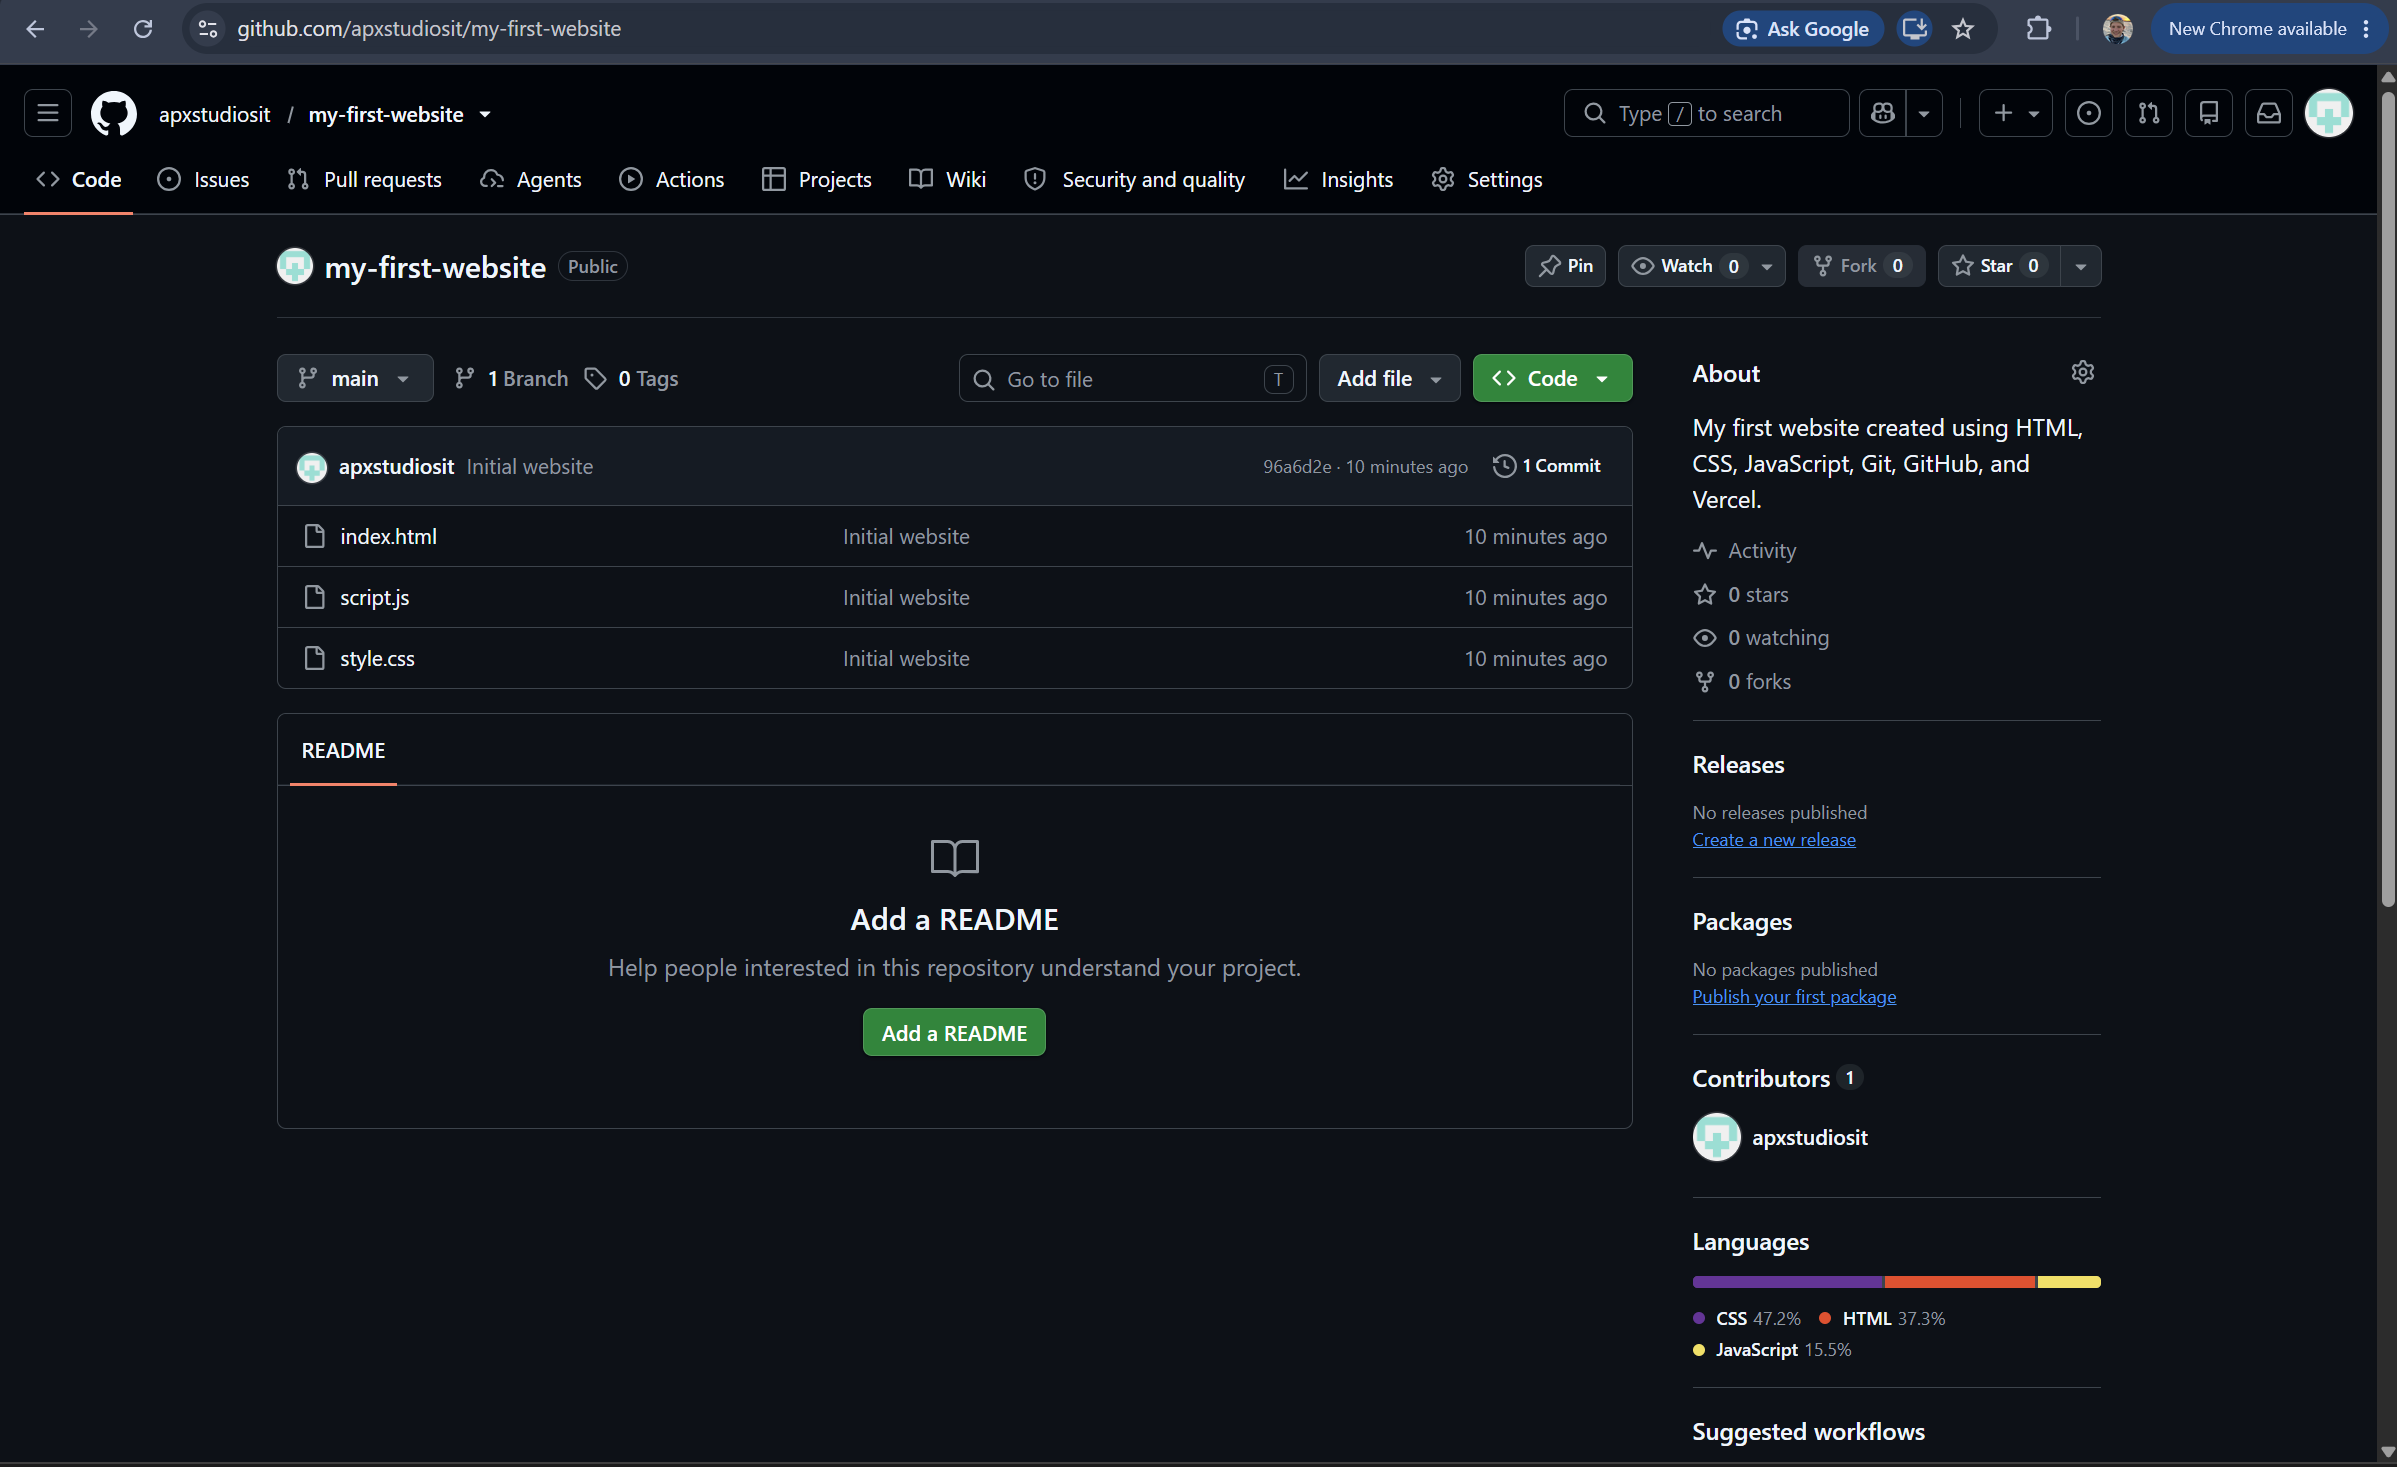
GitHub now stores the project online, but that does not always mean the project is published as a public website. Deployment happens in Vercel in the next chapter.
Deploy the Website with Vercel#
Import the GitHub repository into Vercel and publish the site.
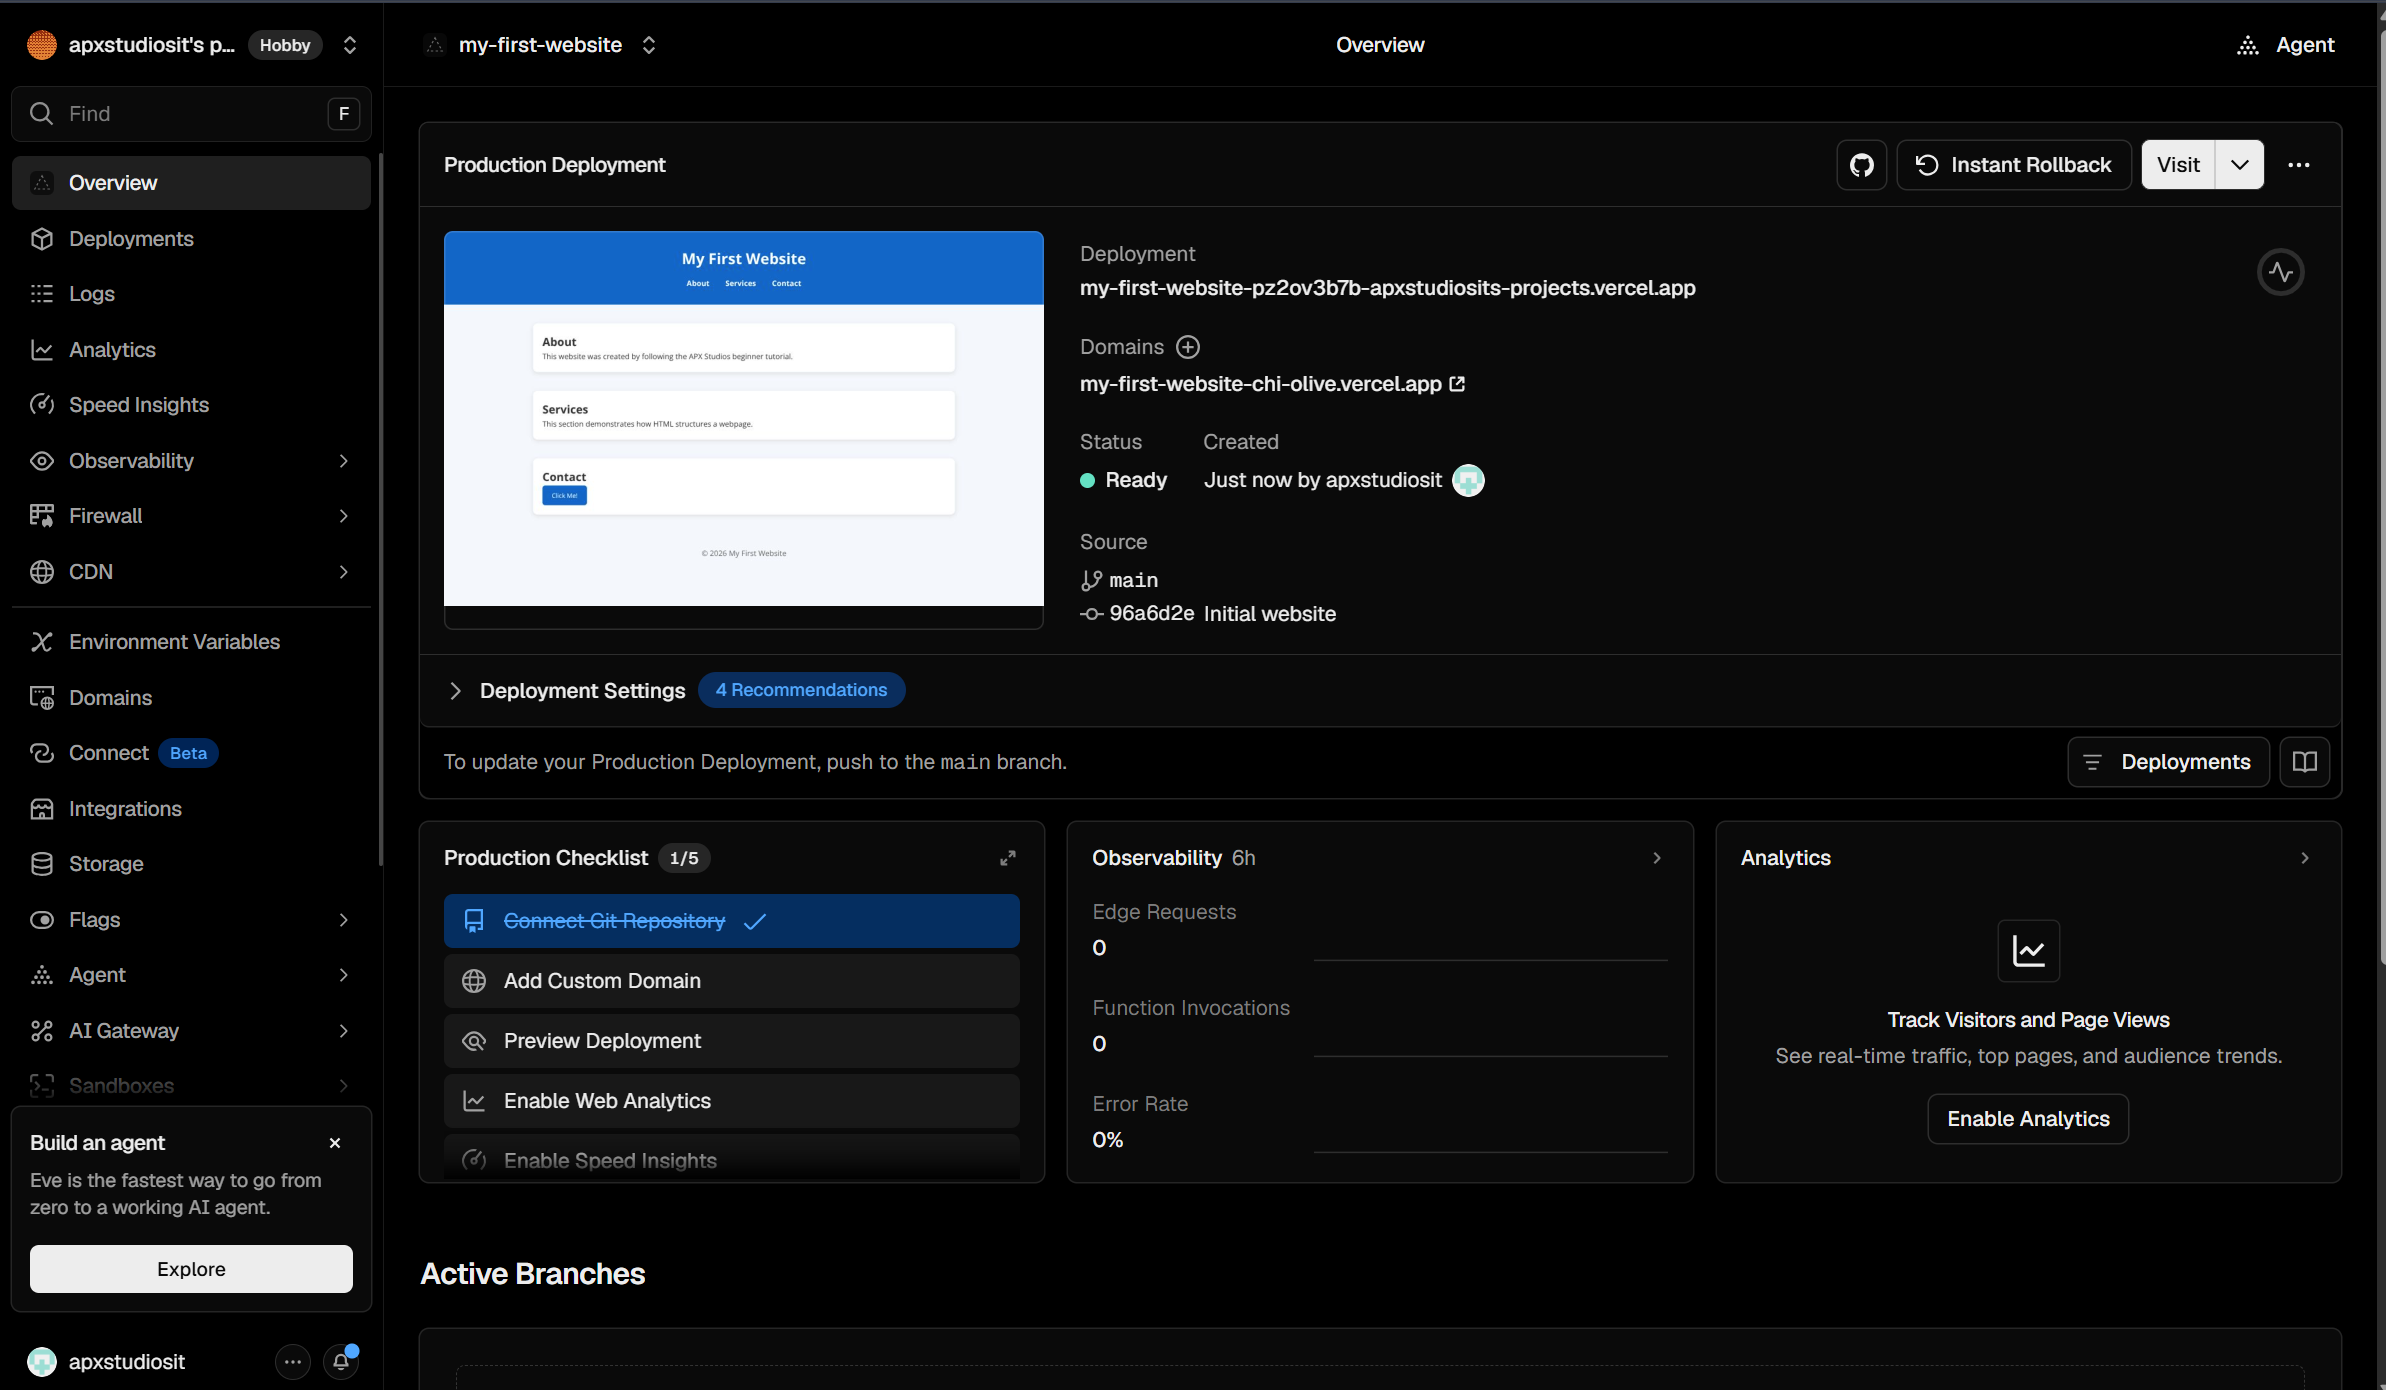
Deployment is the process of making a project available through a public web address. Vercel connects to GitHub, builds or serves the project, and provides a public URL.
- Open the official Vercel website.
- Create an account or sign in.
- Select GitHub as the sign-in method.
- Authorize access when prompted.
- Open the dashboard.
- Select Add New Project.
- Locate my-first-website.
- Import the repository.
- Review the project configuration.
- Confirm that the project root contains index.html.
- Choose an appropriate framework setting for a static HTML project.
- Leave the build command empty when the current interface permits and no build process is needed.
- Leave the output directory at the appropriate default for a root-level static site.
- Start the deployment.
- Wait for the deployment to finish.
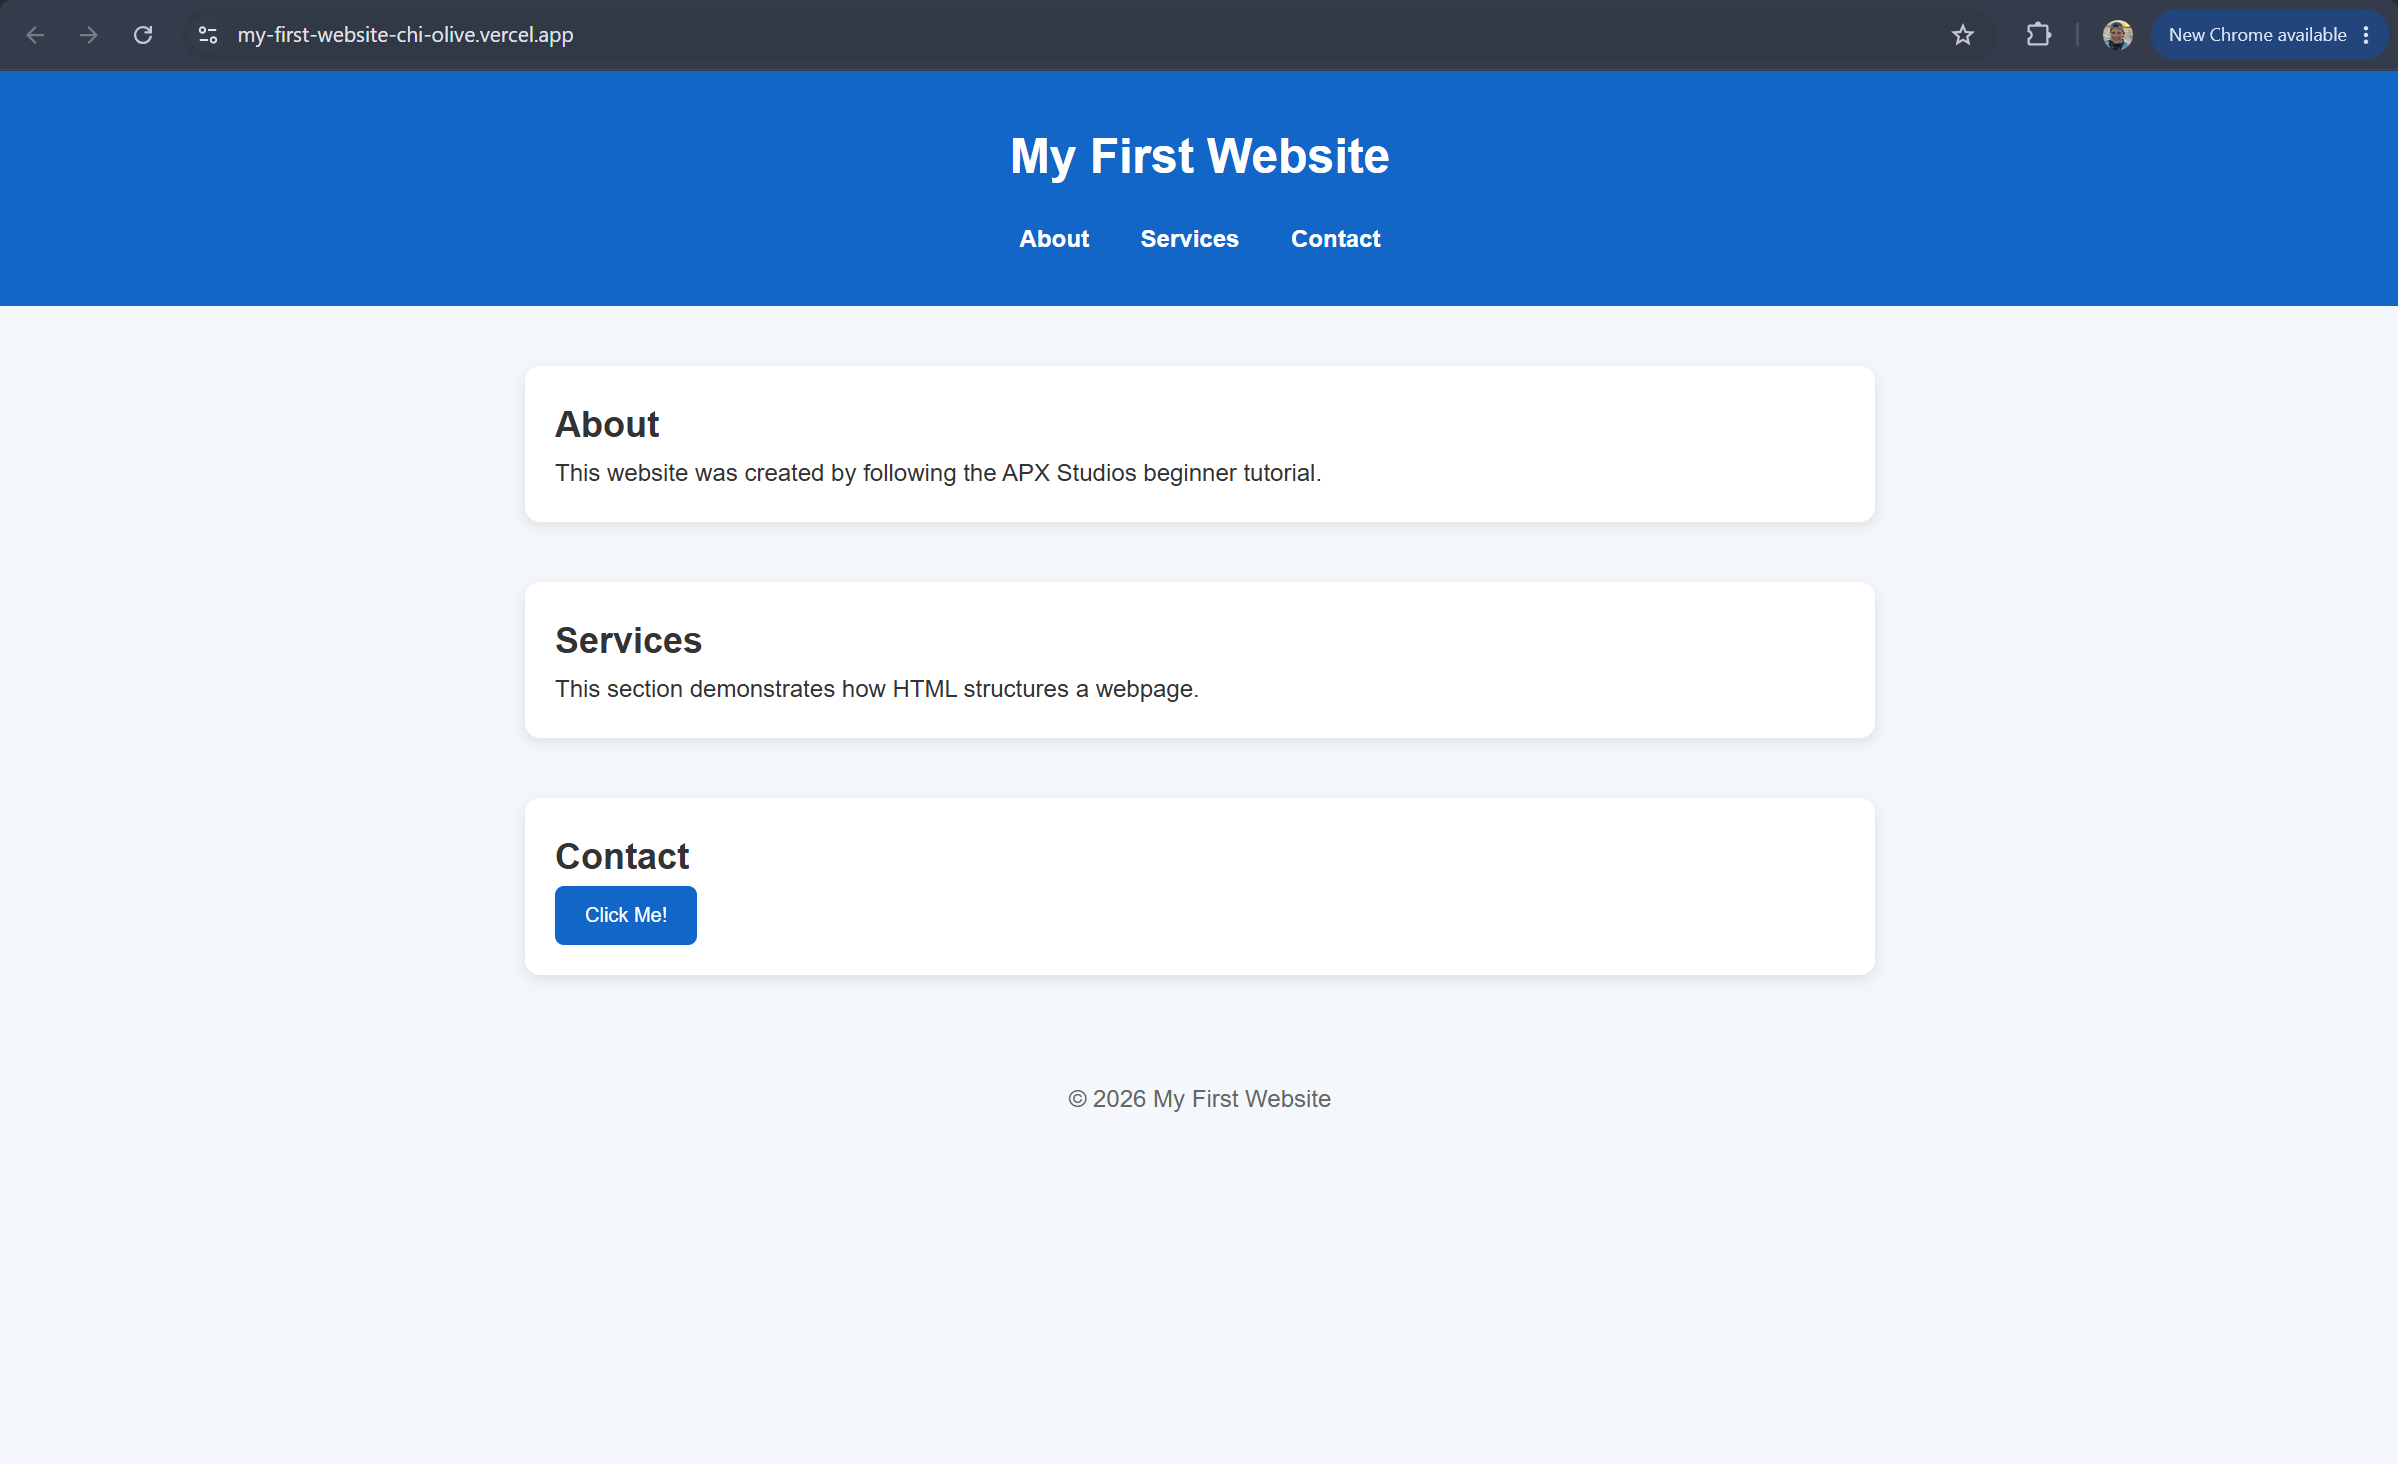
- Open the live website.
- Copy the public .vercel.app URL.
| Deployment state | Meaning |
|---|---|
| Queued | Vercel is waiting to start the deployment. |
| Building | Vercel is preparing the project. |
| Ready | The deployment succeeded and the site is live. |
| Failed | The deployment did not complete. Check the logs for details. |
A static HTML project typically does not need a framework build command because the files can be served directly.
Update the Website#
Make a visible change, push it to GitHub, and verify Vercel redeploys automatically.
A deployed website is not finished forever. You update the local files, commit the change, push to GitHub, and let Vercel deploy the new commit.
- Open index.html.
- Find the hero heading Build a Better Online Presence.
- Change it to Create a Website You Are Proud to Share.
- Save the file.
- Preview the change locally.
git status
git add .
git commit -m "Update website content"
git push
git status confirms the file changed. git add . stages the update. git commit saves the checkpoint. git push sends the new commit to GitHub.
- Confirm the new commit appears on GitHub.
- Open the Vercel project dashboard.
- Confirm a new deployment appears.
- Wait for the deployment to show Ready.
- Open or refresh the live website.
- Confirm the new hero heading appears.
The live URL usually stays the same while Vercel replaces the deployed content behind it. If you do not see the update, the browser may be showing cached content.
Troubleshooting Common Problems#
Use concrete checks and repair steps when installation, preview, GitHub, or Vercel problems occur.
Troubleshooting works best when you isolate one problem at a time. Read the likely cause first, follow the solution steps in order, and confirm the fix before moving to the next task.
- Problem
- The terminal says Git is not available.
- Likely Cause
- Git is not installed, Git was installed while VS Code was open, the terminal session is old, Git was not added to PATH, or the installation did not finish. PATH is the list of locations the operating system searches for executable programs.
- Solution
- Close all VS Code windows.
- Confirm that Git was installed from the official Git website.
- Reopen Visual Studio Code.
- Open a new integrated terminal.
- Run git --version.
- If the command still fails, restart the computer.
- On Windows, rerun the Git installer and verify that Git can be used from the command line.
- On macOS, use the official Git installation method or accept the command-line tools installation prompt when appropriate.
texttext 'git' is not recognized as an internal or external command, operable program or batch file.texttext command not found: gitbashbash git --version- Confirm the Fix
- The terminal displays output similar to git version 2.x.x.
- Prevention Tip
- Install Git before opening VS Code for the project, and avoid unofficial Git repair programs.
- Problem
- git --version does not print a version number.
- Likely Cause
- The terminal is still using an old session, Git installation failed, the command contains a typographic dash, or the reader typed one hyphen instead of two.
- Solution
- Retype the command manually with two standard keyboard hyphens before version.
- Open a new terminal.
- Restart VS Code if the command still fails.
- Reinstall Git from the official Git website if no terminal can find Git.
bashbash git --versiontexttext git version 2.x.x- Confirm the Fix
- The terminal shows git version followed by a version number. The exact version number may differ.
- Prevention Tip
- Avoid copying commands from formatted documents that may replace hyphens with typographic dashes.
- Problem
- Git commands run, but Git cannot find the project files or repository.
- Likely Cause
- Git commands operate on the folder currently open in the terminal, and the terminal may be in a parent folder or another project.
- Solution
- In VS Code, open the Explorer panel.
- Confirm my-first-website is the top-level folder.
- Select Terminal > New Terminal.
- Check that the terminal path ends with my-first-website.
- Run git status.
- If needed, use cd to navigate to the actual folder path where you created the project.
bashbash git statusWindows PowerShell examplepowershell cd path\to\my-first-websitemacOS or common shell examplebash cd path/to/my-first-website- Confirm the Fix
- git status reports information about the my-first-website repository or files.
- Prevention Tip
- Open the project folder directly in VS Code before creating a new terminal.
- Problem
- Git says nothing added to commit.
- Likely Cause
- Files were not saved, no files changed, files were not staged, the terminal is in the wrong folder, or the changes were already committed.
- Solution
- Run git status.
- If files are untracked, stage them with git add .
- If changes are not staged for commit, stage them with git add .
- If Git says working tree clean, there is nothing new to commit.
- If expected files are missing, confirm the terminal is in my-first-website and the files were saved.
texttext nothing added to commitbashbash git statusbashbash git add . git status git commit -m "Describe the change"- Confirm the Fix
- git status moves files to changes to be committed, or reports working tree clean after the commit.
- Prevention Tip
- Save files before running Git commands and check git status before committing.
- Problem
- Git says a remote named origin already exists.
- Likely Cause
- The local repository has already been connected to a remote repository.
- Solution
- Run git remote -v.
- If the URL is correct, do not add origin again.
- If the URL is incorrect, replace it with git remote set-url origin and the correct GitHub HTTPS URL.
- Replace YOUR-USERNAME with your actual GitHub username.
texttext error: remote origin already existsbashbash git remote -vbashbash git remote set-url origin https://github.com/YOUR-USERNAME/my-first-website.git- Confirm the Fix
- git remote -v shows the correct GitHub repository URL for origin.
- Prevention Tip
- Do not remove or replace a remote unless you have verified that its current URL is incorrect.
- Problem
- GitHub reports that the remote repository cannot be found.
- Likely Cause
- The GitHub username or repository name is incorrect, the repository was renamed or deleted, the authenticated account lacks access, the copied URL contains extra characters, or the repository is private and the wrong account is authenticated.
- Solution
- Open GitHub in a browser.
- Sign in.
- Open the repository.
- Copy the HTTPS repository URL again.
- Run git remote -v in VS Code.
- Correct the remote URL if necessary.
- Retry git push -u origin main.
texttext remote: Repository not found.bashbash git remote -vbashbash git remote set-url origin https://github.com/YOUR-USERNAME/my-first-website.gitbashbash git push -u origin main- Confirm the Fix
- The push contacts the correct repository and uploads the commit.
- Prevention Tip
- Copy repository URLs from the GitHub repository page instead of typing them from memory.
- Problem
- GitHub rejects the push during sign-in.
- Likely Cause
- The wrong GitHub account is signed in, stored credentials are outdated, repository access has not been granted, or a normal account password was entered.
- Solution
- Retry the push.
- Complete the browser sign-in when prompted.
- Confirm that the correct GitHub account is selected.
- Approve Git Credential Manager if used.
- Confirm access to the repository.
- Retry the push.
- Confirm the Fix
- Git completes the push without asking for a normal GitHub account password.
- Prevention Tip
- GitHub does not accept a normal account password for command-line Git pushes. Never place passwords, access tokens, private keys, or authentication codes inside index.html, style.css, script.js, screenshots, commits, or public messages.
- Problem
- Git reports that the account does not have permission to write to the repository.
- Likely Cause
- You do not own the repository, the wrong GitHub account is authenticated, the repository belongs to another organization, permissions do not allow writing, or the remote URL uses an authentication method that is not configured.
- Solution
- Confirm the repository owner on GitHub.
- Confirm the signed-in account.
- Verify the remote URL with git remote -v.
- Confirm that the account has write access.
- Use the repository's correct HTTPS URL for this beginner workflow.
- Retry authentication through the browser.
bashbash git remote -v- Confirm the Fix
- The authenticated account can push to the repository.
- Prevention Tip
- Use one GitHub account consistently during the tutorial.
- Problem
- Git rejects the push because the remote has work the local repository does not have.
- Likely Cause
- The GitHub repository may have been initialized with a README, .gitignore, or license.
- Solution
- Confirm your files are saved.
- Confirm your local work is committed.
- Run git pull --rebase origin main.
- Resolve any instructions Git gives you.
- Run git push.
texttext ! [rejected] main -> main (non-fast-forward)bashbash git pull --rebase origin main git push- Confirm the Fix
- The local commit is uploaded after the remote commit.
- Prevention Tip
- Do not use git push --force as a general solution. If histories are unrelated and the beginner workflow cannot continue safely, create a new empty GitHub repository instead of using destructive commands.
- Problem
- Git found different changes to the same part of a file.
- Likely Cause
- Local and remote commits changed overlapping lines.
- Solution
- Open the conflicted file in VS Code.
- Locate the conflict markers.
- Compare both versions.
- Keep the correct content or combine both versions.
- Remove all conflict markers.
- Save the file.
- Stage the resolved file with git add .
- Continue the operation as directed by Git.
- Run git status.
- Push after the conflict is resolved.
texttext <<<<<<< ======= >>>>>>>bashbash git add . git status- Confirm the Fix
- git status no longer reports unresolved conflicts.
- Prevention Tip
- Do not leave conflict markers inside HTML, CSS, or JavaScript files.
- Problem
- The local preview server does not open.
- Likely Cause
- The extension is not installed, the wrong folder is open, index.html is not open, the extension is disabled, VS Code needs to reload, or another process is using the port.
- Solution
- Open Extensions.
- Confirm Live Server is installed and enabled.
- Open index.html.
- Confirm the full my-first-website folder is open.
- Restart VS Code.
- Select Go Live again.
- If necessary, use the Command Palette to run the Live Server start command.
- Confirm the Fix
- A browser opens a local address and displays BrightPath Studio.
- Prevention Tip
- Open the project folder and index.html before selecting Go Live.
- Problem
- The Go Live status-bar button is not visible.
- Likely Cause
- Live Server is not installed, the workspace is not trusted, no project folder is open, the extension has not activated, or the interface location changed.
- Solution
- Confirm Live Server is installed.
- Trust the workspace if VS Code asks.
- Open the my-first-website folder.
- Open index.html.
- Use the Command Palette and search for the Live Server start command.
- Try the right-click menu in the HTML editor if available.
- Confirm the Fix
- Live Server starts from an alternate command even if the status-bar button is missing.
- Prevention Tip
- Install extensions from inside the workspace where you plan to use them.
- Problem
- Live Server reports that the selected port is unavailable.
- Likely Cause
- Another local server is already using the same port.
- Solution
- Stop the other Live Server session.
- Close old VS Code windows.
- Stop the server from the status bar.
- Restart VS Code.
- Allow Live Server to select another available port.
- Confirm the Fix
- The page loads on a local URL, even if the port number is different.
- Prevention Tip
- Stop local servers when you finish working.
- Problem
- The local or deployed page appears empty.
- Likely Cause
- index.html is empty, HTML was pasted into the wrong file, the file was not saved, a severe syntax issue exists, the browser opened the wrong folder or file, or CSS is hiding content.
- Solution
- Confirm index.html contains the full HTML.
- Save all files.
- Confirm the browser URL points to the correct local server.
- Open the browser developer console if appropriate.
- Confirm that main content exists in the Elements panel.
- Temporarily check whether CSS is hiding the content.
- Compare file names carefully.
- Confirm the Fix
- The BrightPath Studio heading and sections appear in the browser.
- Prevention Tip
- Save files and preview after each major section instead of waiting until the end.
- Problem
- The page displays unstyled HTML.
- Likely Cause
- The CSS file is named incorrectly, style.css is outside the project folder, the stylesheet link is incorrect, the actual file is style.css.txt, browser cache is showing older content, or CSS contains a syntax error.
- Solution
- Confirm the exact file name is style.css.
- Confirm lowercase spelling.
- Confirm style.css is in the same folder as index.html.
- Save the file.
- Refresh the browser.
- Check for missing braces.
htmlhtml <link rel="stylesheet" href="style.css">- Confirm the Fix
- The page displays the designed layout, colors, and cards.
- Prevention Tip
- Keep all project file names lowercase and visible in VS Code Explorer.
- Problem
- Buttons do not respond, the year does not update, or dark mode does not work.
- Likely Cause
- The file is named incorrectly, the script path is wrong, JavaScript was pasted into the wrong file, IDs or class names do not match, a syntax error stops execution, or the script was not saved.
- Solution
- Confirm script.js is in the project folder.
- Confirm the script reference.
- Save the file.
- Open the browser console.
- Look for the first error.
- Compare selector spelling and capitalization.
- Confirm the button IDs match the JavaScript.
htmlhtml <script src="script.js" defer></script>- Confirm the Fix
- The mobile menu, dark mode, footer year, and encouragement button all work.
- Prevention Tip
- One early JavaScript error can prevent later code from running, so fix the first console error first.
- Problem
- Dark mode works temporarily but resets after reload.
- Likely Cause
- The localStorage key is inconsistent, the code saves one value and reads another, browser privacy settings clear storage, JavaScript did not run, or the theme class does not match CSS.
- Solution
- Confirm dark mode works during the current session.
- Compare the stored key name.
- Compare the stored value.
- Compare the CSS dark-mode selector.
- Compare the HTML class changed by JavaScript.
- Check browser privacy settings if storage is cleared on reload.
- Confirm the Fix
- Reloading the page keeps the selected theme.
- Prevention Tip
- Use one consistent localStorage key and one consistent theme class name.
- Problem
- The site works locally but files fail after deployment.
- Likely Cause
- Hosting systems may treat Style.css and style.css as different files. The same issue applies to Script.js and script.js, or Index.html and index.html.
- Solution
- Rename files to index.html, style.css, and script.js.
- Update HTML references to match exactly.
- Commit the rename.
- Push the change.
- Wait for Vercel to redeploy.
- Confirm the Fix
- The deployed page loads CSS and JavaScript correctly.
- Prevention Tip
- Use consistent lowercase file names for beginner website projects.
- Problem
- Vercel cannot serve the static website.
- Likely Cause
- index.html is not at the selected root directory, the wrong repository was imported, files are inside a nested folder, the Root Directory setting is incorrect, or the filename uses incorrect capitalization.
- Solution
- Open the GitHub repository.
- Confirm where index.html is located.
- Open the Vercel project settings.
- Confirm the root directory points to the folder containing index.html.
- Redeploy.
- Confirm the Fix
- Vercel deploys the root-level static site successfully.
- Prevention Tip
- Keep index.html at the repository root for this beginner workflow.
- Problem
- Vercel shows a failed deployment.
- Likely Cause
- The project root is wrong, index.html is missing, an unnecessary build command was added, or a previous error caused later errors.
- Solution
- Open the failed deployment.
- View deployment details or logs.
- Locate the first meaningful error.
- Confirm project files are present.
- Confirm no unnecessary build command was added.
- Confirm the project root.
- Confirm index.html exists.
- Correct the problem.
- Commit and push the correction.
- Verify that Vercel starts another deployment.
- Confirm the Fix
- The next deployment reaches Ready.
- Prevention Tip
- Do not share logs publicly without checking them for private information.
- Problem
- The public website URL shows a 404 page.
- Likely Cause
- The URL is incorrect, deployment is not ready, index.html is missing, project root is incorrect, the route does not exist, or the deployment was deleted.
- Solution
- Open the Vercel dashboard.
- Confirm the deployment status is Ready.
- Open the production URL from Vercel.
- Confirm index.html exists in the repository.
- Confirm the project root.
- Avoid adding extra path segments that do not exist in the static site.
- Confirm the Fix
- The public URL displays the BrightPath Studio homepage.
- Prevention Tip
- Copy the production URL from Vercel after deployment succeeds.
- Problem
- The live page still shows old content.
- Likely Cause
- Changes were not saved, committed, or pushed; Vercel is still building; deployment failed; browser cache is old; the reader is viewing an old preview URL; or the wrong Git branch is connected.
- Solution
- Confirm the latest commit on GitHub.
- Confirm the latest Vercel deployment.
- Confirm the deployment status is Ready.
- Open the production URL.
- Refresh the browser.
- Use a private browser window or hard refresh if necessary.
bashbash git status git log --oneline git remote -v- Confirm the Fix
- The live page displays the latest hero heading or content update.
- Prevention Tip
- Use GitHub and Vercel dashboards to trace whether a change reached each step.
- Problem
- Vercel cannot find the expected repository or imports the wrong project.
- Likely Cause
- The Vercel account is connected to a different GitHub account or does not have repository access.
- Solution
- Confirm the GitHub account used by Vercel.
- Confirm repository access.
- Review connected Git integrations.
- Reauthorize access if necessary.
- Import the correct repository.
- Confirm the Fix
- The my-first-website repository appears in the Vercel import list.
- Prevention Tip
- Use the same GitHub account through GitHub, Git Credential Manager, and Vercel during the tutorial.
What You Accomplished#
Review the complete workflow and choose practical next steps.
You built and published a complete website workflow from local files to a public deployment.
- Installed Visual Studio Code.
- Installed Git.
- Created a website project.
- Built a semantic HTML page.
- Styled the website with CSS.
- Added JavaScript interaction.
- Previewed the project with Live Server.
- Initialized a Git repository.
- Configured Git identity.
- Staged files.
- Created commits.
- Created a GitHub repository.
- Uploaded the project.
- Deployed the site with Vercel.
- Updated the live website through a Git push.
Next Steps#
- Add more semantic HTML sections.
- Build real forms.
- Run accessibility testing.
- Practice advanced CSS layouts.
- Add carefully controlled CSS animations.
- Study JavaScript fundamentals.
- Use Git branches.
- Create pull requests.
- Connect a custom domain.
- Improve search-engine optimization.
- Explore React.
- Explore Next.js.
You now have the foundation for a professional website workflow. Keep the first version simple, make one improvement at a time, and use Git commits to record your progress.
Git Command Reference#
Use this table as a quick reference while completing the Git and GitHub parts of the tutorial. Placeholder values such as YOUR-USERNAME must be replaced before running a command.
| Command | Purpose | When to Use It |
|---|---|---|
git --version | Shows the installed Git version. | After installing Git or troubleshooting PATH. |
git config --global user.name "Your Name" | Sets the commit author name. | Before the first commit on a computer. |
git config --global user.email "your-email@example.com" | Sets the commit author email. | Before the first commit on a computer. |
git init | Creates a local Git repository. | Once inside my-first-website. |
git status | Shows file and staging state. | Before and after staging or committing. |
git add . | Stages current project changes. | Before creating a commit. |
git commit -m "Initial website" | Creates a labeled checkpoint. | After staging the first website files. |
git log --oneline | Shows compact commit history. | To verify a commit exists. |
git remote -v | Lists connected remote repositories. | When verifying GitHub connection. |
git remote add origin https://github.com/YOUR-USERNAME/my-first-website.git | Connects the local repository to GitHub. | After creating the empty GitHub repository. |
git remote set-url origin https://github.com/YOUR-USERNAME/my-first-website.git | Corrects the origin URL. | When origin points to the wrong repository. |
git branch -M main | Renames the active branch to main. | Before the first push if needed. |
git push -u origin main | Uploads the first commit and sets upstream tracking. | The first time pushing to GitHub. |
git push | Uploads later commits. | After upstream tracking has been set. |
git pull --rebase origin main | Downloads remote work and replays local commits after it. | When a beginner-safe non-fast-forward repair is needed. |
Glossary#
Accessibility
Designing and coding so people with different abilities and technologies can use the website.
Branch
A line of work in Git. This tutorial uses the main branch.
Cache
Saved browser data that can make an older version of a page appear.
Commit
A saved checkpoint in Git history with a message.
CSS
Cascading Style Sheets, the language used to style HTML content.
Deployment
The process of making a project available through a public web address.
Git
Version-control software that records file changes on your computer.
GitHub
An online service for storing Git repositories.
HTML
HyperText Markup Language, the language used to structure webpage content.
JavaScript
A programming language that adds behavior and interaction to webpages.
Live Server
A VS Code extension that previews local website files in a browser.
Localhost
An address that points to a server running on your own computer.
PATH
The operating-system list of locations searched for executable programs.
Repository
A project folder plus Git history.
Responsive design
A layout that adapts to different screen sizes.
Staging area
A Git review area for files that will go into the next commit.
Vercel
A deployment platform that can publish a GitHub repository as a website.
Accessibility Checklist#
- Use one clear H1 on the example website.
- Keep heading levels in logical order.
- Provide a skip link to main content.
- Use semantic header, nav, main, section, article, and footer elements.
- Give buttons clear accessible names.
- Update aria-expanded when the mobile menu opens or closes.
- Use aria-live for the JavaScript-generated message.
- Make keyboard focus visible with :focus-visible.
- Keep text contrast readable in light and dark modes.
- Do not rely only on color to communicate meaning.
- Make navigation links match visible section targets.
- Respect prefers-reduced-motion.
- Keep mobile touch targets at least 44 pixels tall where practical.
- Ensure code blocks and tables scroll instead of overflowing.
- Include meaningful screenshot captions and recommended alt text.
Final Project Checklist#
- The project folder is named my-first-website.
- index.html, style.css, and script.js are in the same folder.
- The BrightPath Studio page works locally.
- The mobile menu opens and closes.
- The dark-mode toggle works and persists.
- The current footer year updates.
- Git identity is configured.
- The first commit exists.
- The GitHub repository contains all three files.
- The Vercel deployment is Ready.
- The public Vercel URL loads the website.
- A later update commit triggers a new Vercel deployment.
- No passwords, tokens, or private keys appear in files or screenshots.
Publication Notes#
This tutorial is prepared as a practical learning resource by Andrew Pino and published by APX Studios.
Use the print button to create a clean copy with headings, procedures, code blocks, figure captions, callout labels, and reference sections preserved.